tensorflow Object Detection API使用预训练模型mask r-cnn实现对象检测
极市平台(ExtremeMart)是深圳极视角旗下的专业视觉算法开发与分发平台,为开发者提供行业场景集,每月上百真实项目需求,算法分发,技术共享等,旨在联合开发者建立起良好的计算机视觉生态。已与上百名开发者建立了合作并转化了上百种视觉算法。
为加速广大开发者视觉算法的转化及变现,极市开启了有奖视觉demo征集活动,通过测试的优秀demo(不需要源码!)提交者将会得到丰厚奖励和更多合作机会,点击了解详情。
来源:OpenCV学堂
Mask R-CNN是何恺明大神在2017年整出来的新网络模型,在原有的R-CNN基础上实现了区域ROI的像素级别分割。关于Mask R-CNN模型本身的介绍与解释网络上面已经是铺天盖地了,论文也是到处可以看到。这里主要想介绍一下在tensorflow中如何使用预训练的Mask R-CNN模型实现对象检测与像素级别的分割。tensorflow框架有个扩展模块叫做models里面包含了很多预训练的网络模型,提供给tensorflow开发者直接使用或者迁移学习使用,首先需要下载Mask R-CNN网络模型,这个在tensorflow的models的github上面有详细的解释与model zoo的页面介绍, tensorflow models的github主页地址如下: https://github.com/tensorflow/models
我这里下载的是:
mask_rcnn_inception_v2_coco_2018_01_28.tar.gz
下载好模型之后可以解压缩为tar文件,然后通过下面的代码读入模型
     MODEL_NAME = 'mask_rcnn_inception_v2_coco_2018_01_28'


     MODEL_FILE = 'D:/tensorflow/' + MODEL_NAME + '.tar'


     # Path to frozen detection graph


     PATH_TO_CKPT = MODEL_NAME + '/frozen_inference_graph.pb'


     # List of the strings that is used to add correct label for each box.


     PATH_TO_LABELS = os.path.join('D:/tensorflow/models/research/object_detection/data', 'mscoco_label_map.pbtxt')


     NUM_CLASSES = 90


     tar_file = tarfile.open(MODEL_FILE)


     for file in tar_file.getmembers():


         file_name = os.path.basename(file.name)


         if 'frozen_inference_graph.pb' in file_name:


             tar_file.extract(file, os.getcwd())


     detection_graph = tf.Graph()


     with detection_graph.as_default():


         od_graph_def = tf.GraphDef()


         with tf.gfile.GFile(PATH_TO_CKPT, 'rb') as fid:


             serialized_graph = fid.read()


             od_graph_def.ParseFromString(serialized_graph)


             tf.import_graph_def(od_graph_def, name='')
模型使用coco数据集,可以检测与分割90个对象类别,所以下面需要把对应labelmap文件读进去,这个文件在
models\research\objectdetection\data
目录下,实现代码如下:
     label_map = label_map_util.load_labelmap(PATH_TO_LABELS)


     categories = label_map_util.convert_label_map_to_categories(label_map, max_num_classes=NUM_CLASSES, use_display_name=True)


     category_index = label_map_util.create_category_index(categories)
有了这个之后就需要从模型中取出如下几个tensor
num_detections 表示检测对象数目
detection_boxes 表示输出框BB
detection_scores 表示得分
detection_classes 表示对象类别索引
detection_masks 表示mask分割
然后在会话中运行这几个tensor即可,代码实现如下:
     def run_inference_for_single_image(image, graph):


         with graph.as_default():


             with tf.Session() as sess:


                 # Get handles to input and output tensors


                 ops = tf.get_default_graph().get_operations()


                 all_tensor_names = {output.name for op in ops for output in op.outputs}


                 tensor_dict = {}


                 for key in ['num_detections', 'detection_boxes', 'detection_scores', 'detection_classes', 'detection_masks']:


                     tensor_name = key + ':0'


                     if tensor_name in all_tensor_names:


                         tensor_dict[key] = tf.get_default_graph().get_tensor_by_name(tensor_name)


                 if 'detection_masks' in tensor_dict:


                     # The following processing is only for single image


                     detection_boxes = tf.squeeze(tensor_dict['detection_boxes'], [0])


                     detection_masks = tf.squeeze(tensor_dict['detection_masks'], [0])


                     # Reframe is required to translate mask from box coordinates to image coordinates and fit the image size.


                     real_num_detection = tf.cast(tensor_dict['num_detections'][0], tf.int32)


                     detection_boxes = tf.slice(detection_boxes, [0, 0], [real_num_detection, -1])


                     detection_masks = tf.slice(detection_masks, [0, 0, 0], [real_num_detection, -1, -1])


                     detection_masks_reframed = utils_ops.reframe_box_masks_to_image_masks(


                         detection_masks, detection_boxes, image.shape[0], image.shape[1])


                     detection_masks_reframed = tf.cast(


                         tf.greater(detection_masks_reframed, 0.5), tf.uint8)


                     # Follow the convention by adding back the batch dimension


                     tensor_dict['detection_masks'] = tf.expand_dims(


                         detection_masks_reframed, 0)


                 image_tensor = tf.get_default_graph().get_tensor_by_name('image_tensor:0')


                 # Run inference


                 output_dict = sess.run(tensor_dict,


                                      feed_dict={image_tensor: np.expand_dims(image, 0)})


                 # all outputs are float32 numpy arrays, so convert types as appropriate


                 output_dict['num_detections'] = int(output_dict['num_detections'][0])


                 output_dict['detection_classes'] = output_dict[


                   'detection_classes'][0].astype(np.uint8)


                 output_dict['detection_boxes'] = output_dict['detection_boxes'][0]


                 output_dict['detection_scores'] = output_dict['detection_scores'][0]


                 if 'detection_masks' in output_dict:


                     output_dict['detection_masks'] = output_dict['detection_masks'][0]


             return output_dict
下面就是通过opencv来读取一张彩色测试图像,然后调用模型进行检测与对象分割,代码实现如下:
     image = cv2.imread("D:/apple.jpg");


     # image = cv2.imread("D:/tensorflow/models/research/object_detection/test_images/image2.jpg");


     cv2.imshow("input image", image)


     print(image.shape)


     # Actual detection.


     output_dict = run_inference_for_single_image(image, detection_graph)


     # Visualization of the results of a detection.


     vis_util.visualize_boxes_and_labels_on_image_array(


         image,


         output_dict['detection_boxes'],


         output_dict['detection_classes'],


         output_dict['detection_scores'],


         category_index,


         instance_masks=output_dict.get('detection_masks'),


         use_normalized_coordinates=True,


         line_thickness=8)
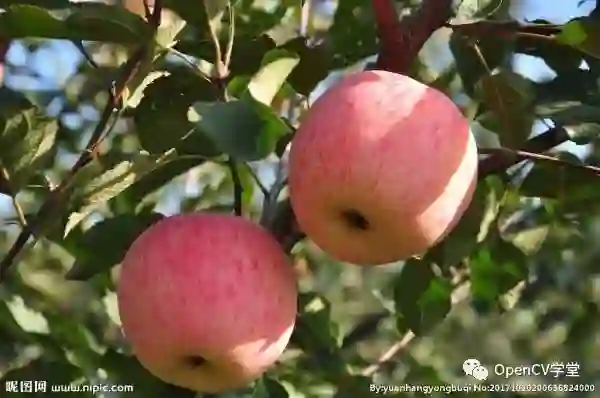
原图如下:
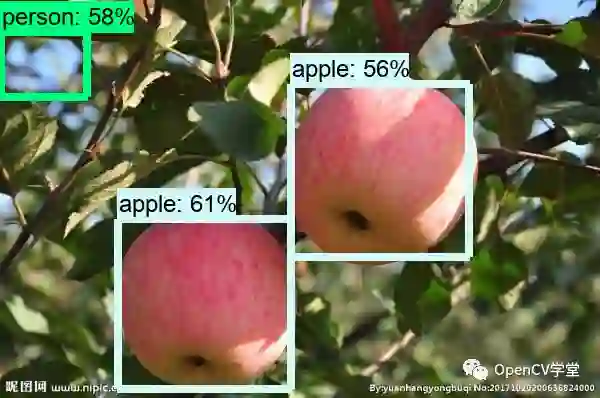
检测运行结果如下:
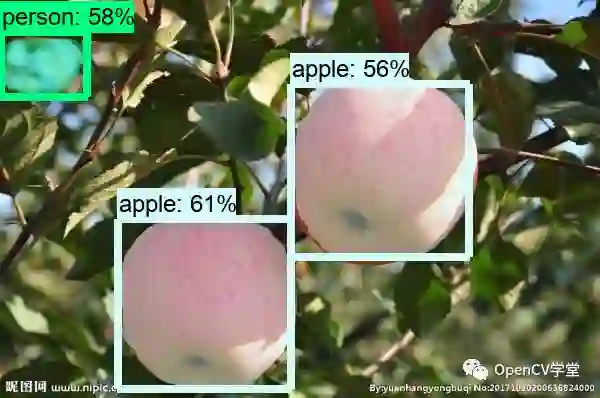
带mask分割效果如下:
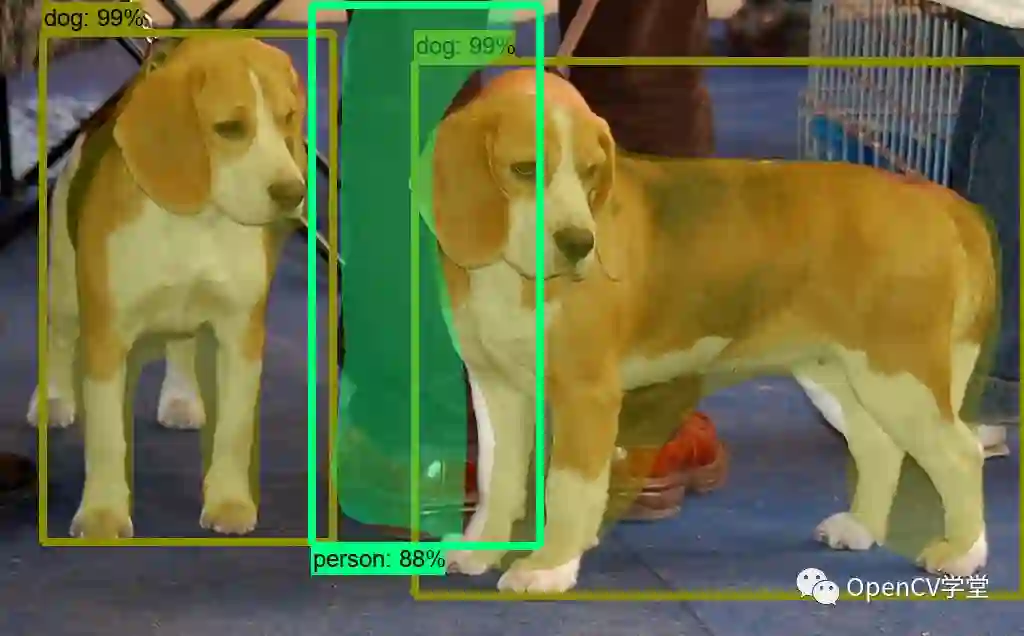
官方测试图像运行结果:
*推荐阅读*
10分钟上手,OpenCV自然场景文本检测(Python代码+实现)
使用TensorFlow目标检测和OpenCV分析足球视频
为加速广大开发者视觉算法的转化及变现,极市开启了有奖视觉demo征集活动,通过测试的优秀demo(不需要源码!)提交者将会得到丰厚奖励和更多合作机会,点击了解详情。