Github项目推荐 | 用TensorFlow 2.0实现CartoonGAN图片卡通化
by LeeMeng & mnicnc404
通过本项目,你可以使用由TensorFlow 2.0 Alpha驱动的CartoonGAN(CVPR 2018)工具生成你自己的卡通风格图像。
查看博客文章,包括项目概述、在线演示和生成的动漫图库:
https://leemeng.tw/generate-anime-using-cartoongan-and-tensorflow2-en.html
Github项目地址:
https://github.com/mnicnc404/CartoonGan-tensorflow#cartoonize-using-tensorflowjs
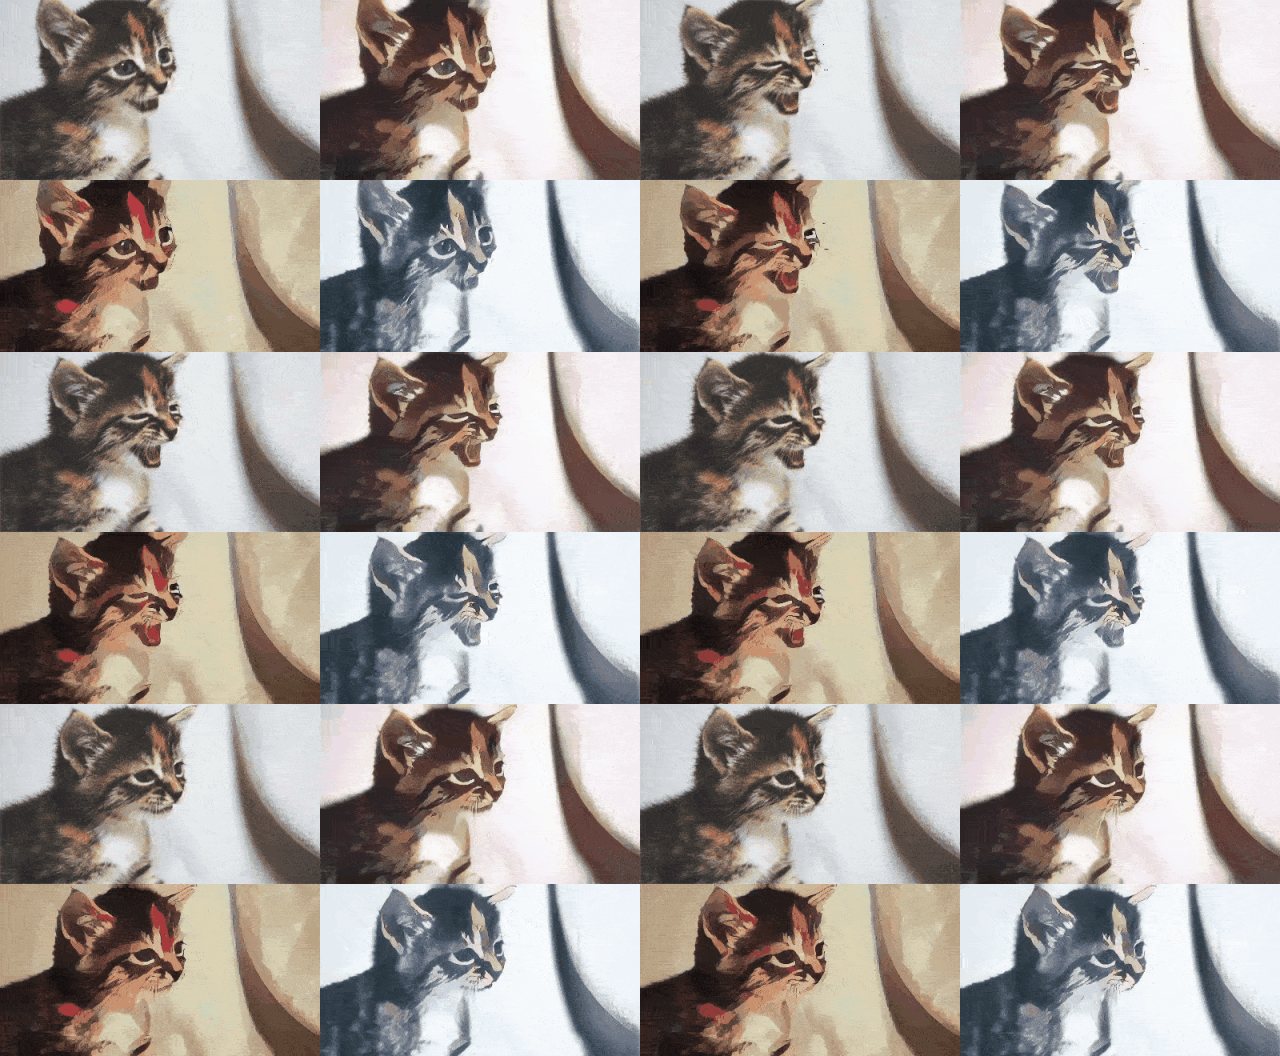
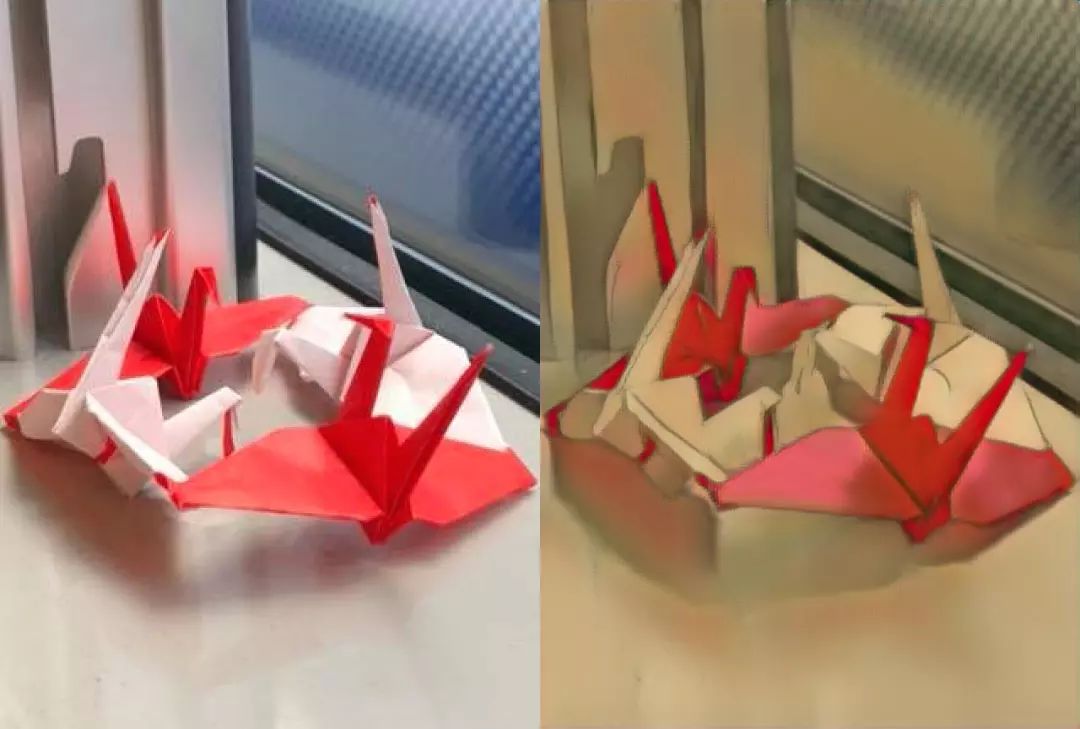
左上角是原始图像,其他3个图像由CartoonGAN使用不同的动漫样式生成。
训练自己的专属CartoonGAN
在本节中,我们将解释如何使用我们提供的脚本训练CartoonGAN。
设置环境
首先克隆本项目:
git clone https://github.com/mnicnc404/CartoonGan-tensorflow.git要正确运行本项目的代码,你需要安装好以下环境:
Python 3.6
TensorFlow 2.0 Alpha
tqdm
imageio
tb-nightly
我们建议使用Conda进行环境管理。 你可以通过安装 Anaconda 或 Miniconda来获取。 如果你的GPU带得动的话,则可以通过运行以下命令来安装所有软件包:
conda env create -n cartoongan -f environment_gpu.yml # Installs python==3.6.8 to the new environmentconda activate cartoongan# to deactivate this env, run "conda deactivate"
虽然不建议在没有GPU的情况下训练CartoonGAN,但你仍然可以通过运行来设置环境:
conda env create -n cartoongan -f environment_cpu.yml # Installs python==3.6.8 to the new environmentconda activate cartoongan# to deactivate this env, run "conda deactivate"
如果Anaconda不可用,你还可以运行:
pip install -r requirements_gpu.txtuse `requirements_cpu` if GPU is not available
对于我们在CartoonGAN实现中使用的一些自定义Keras层,你还需要安装TensorFlow版本的keras-contrib:
git clone https://www.github.com/keras-team/keras-contrib.git \&& cd keras-contrib \&& python convert_to_tf_keras.py \&& USE_TF_KERAS=1 python setup.py install
至此,环境设置工作已经完毕~
准备数据
你还需要准备自己的数据集并在datasets文件夹下按以下方式排列图像,如下所示:
datasets└── YourDataset [your dataset name]├── testA [(must) 8 real-world images for evaluation]├── trainA [(must) (source) real-world images]├── trainB [(must) (target) cartoon images]└── trainB_smooth [(must, but can be generated by running scripts/smooth.py) cartoon images with smooth edges]
trainA和testA文件夹包含原始的图像,而trainB包含具有所需卡通风格的图像。 注意,testA文件夹中的8个图像将在每个纪元后进行评估,因此它们不会出现在trainA中。
为了生成trainB_smooth,可以运行scripts/smooth.py:
python path/to/smooth.py --path path/to/datasets/YourDataset # YourDataset should contain trainB for executing this scriptsmooth.py credit to taki0112 https://github.com/taki0112/CartoonGAN-Tensorflow/blob/master/edge_smooth.py
开始训练
虽然你可能需要调整超参数以为你自己的数据集生成最佳结果,但是训练我们发现以下有效的设置可能是你成功的起点。
如果GPU的内存超过16GB,可以尝试这些设置(注意--light表示我们正在使用轻量级发生器训练GAN):
python train.py \--batch_size 8 \--pretrain_epochs 1 \--content_lambda .4 \--pretrain_learning_rate 2e-4 \--g_adv_lambda 8. \--generator_lr 8e-5 \--discriminator_lr 3e-5 \--style_lambda 25. \--light \--dataset_name {your dataset name}
请注意,style_lambda用于样式丢失 (source)。 如果你的GPU没有16GB内存,则可以使用较小的batch_size并相应地使用较低的学习速率。 例如,在batch_size = 4的时候,你可以尝试:
python train.py \--batch_size 4 \--pretrain_epochs 1 \--content_lambda .4 \--pretrain_learning_rate 1e-4 \--g_adv_lambda 8. \--generator_lr 4e-5 \--discriminator_lr 1.5e-5 \--style_lambda 25. \--light \--dataset_name {your dataset name}
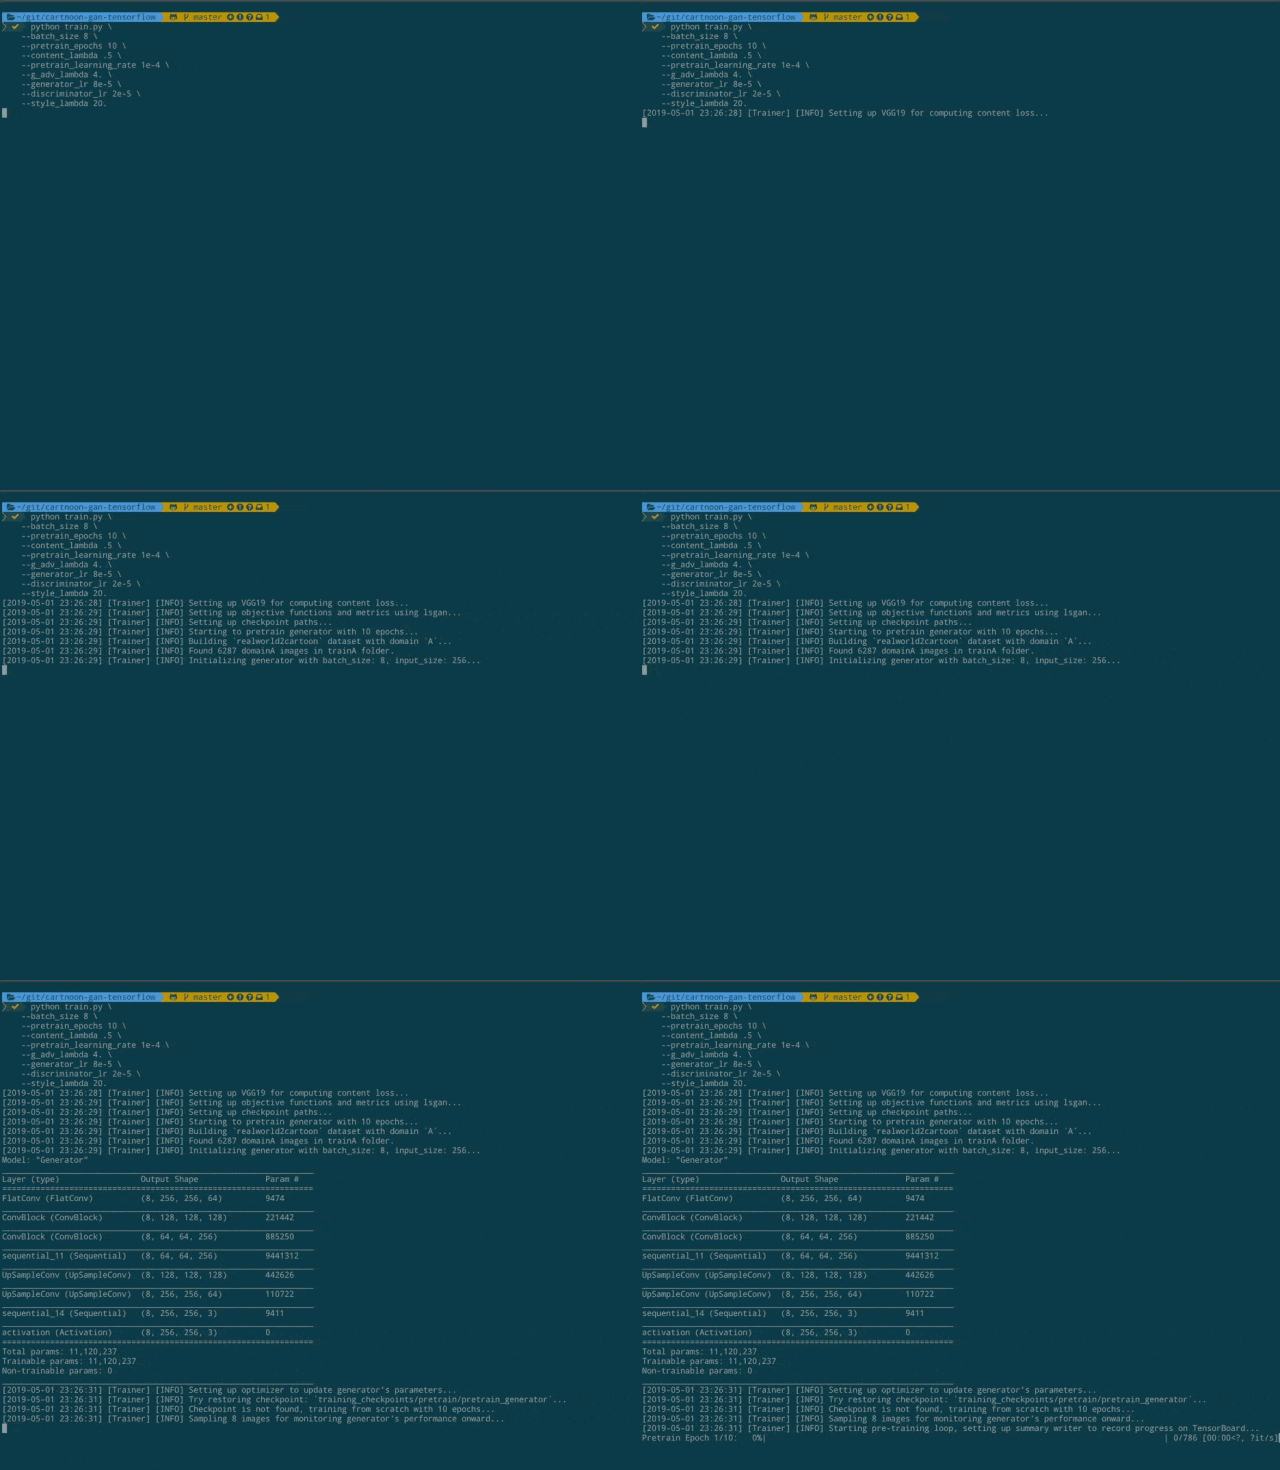
这里提供了详细的日志消息,模型架构和进度条,可以使你可以更好地了解训练训CartoonGAN时发生的情况。
选择模型架构
请注意,我们在前面的示例中指定了--light:
指定了模型以后,train.py将初始化一个轻量级生成器来训练CartoonGAN。
在设计轻量化发生器时,以ShuffleNet V2 作为参考。该生成器在实现类似效果的同时,将推理时间最小化。当-light被指定时,我们也会对鉴别器做一些小的调整。
生成器由原来的CartoonGAN作者提出。
如果要使用CartoonGAN作者提出的原始生成器/鉴别器体系结构来训练CartoonGAN,只需要删除 --light选项即可:
python train.py \--batch_size 8 \--pretrain_epochs 1 \--content_lambda .4 \--pretrain_learning_rate 2e-4 \--g_adv_lambda 8. \--generator_lr 8e-5 \--discriminator_lr 3e-5 \--style_lambda 25. \--dataset_name {your dataset name}
监控训练进度
在本项目中,TensorBoard已经完美集成,因此你可以通过以下方式轻松监控模型的性能:
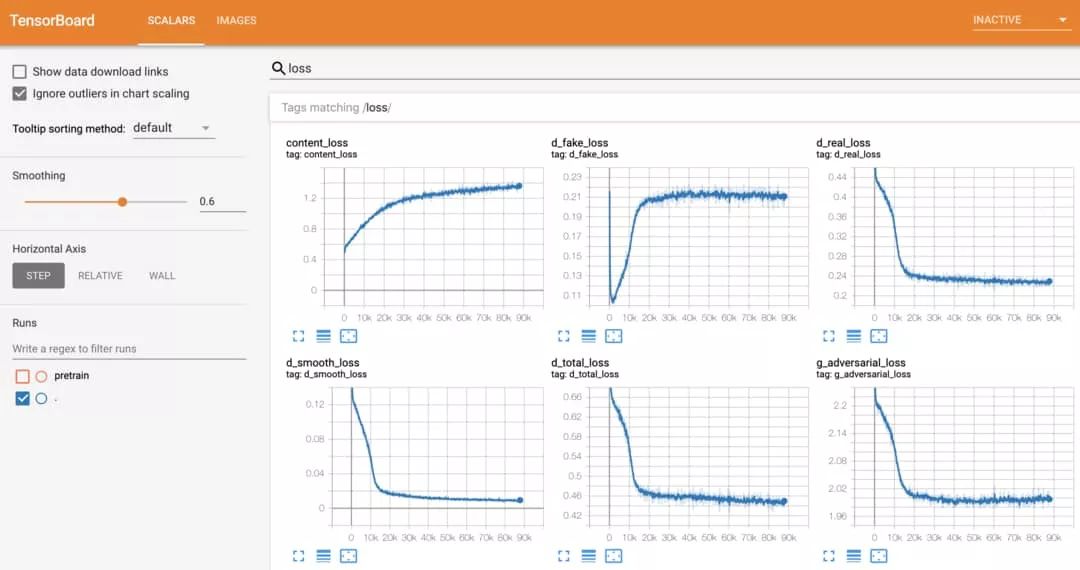
tensorboard --logdir runs经过一段时间的训练,你应该能够看到以下的数据图示:
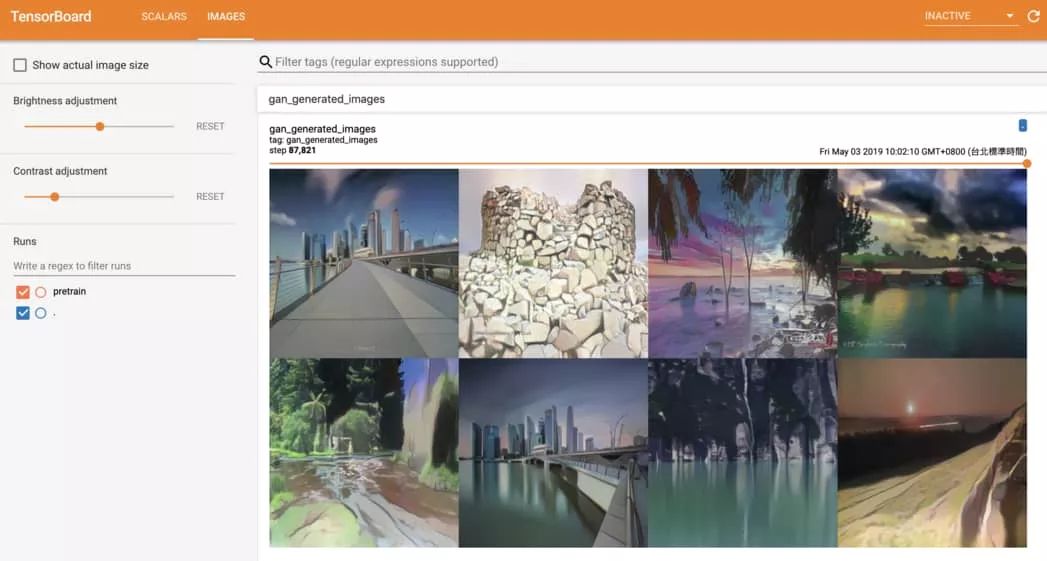
除了指标和损失函数之外,最好还要关注GAN在训练期间生成的图像。使用我们的脚本来监控TensorBoard上生成的图像是明智的做法:
有关训练的更多信息,可以查看 train.py。
使用训练好的CartoonGAN生成动漫风格图像
在本节中,我们将介绍如何使用经过训练的CartoonGAN生成动画。
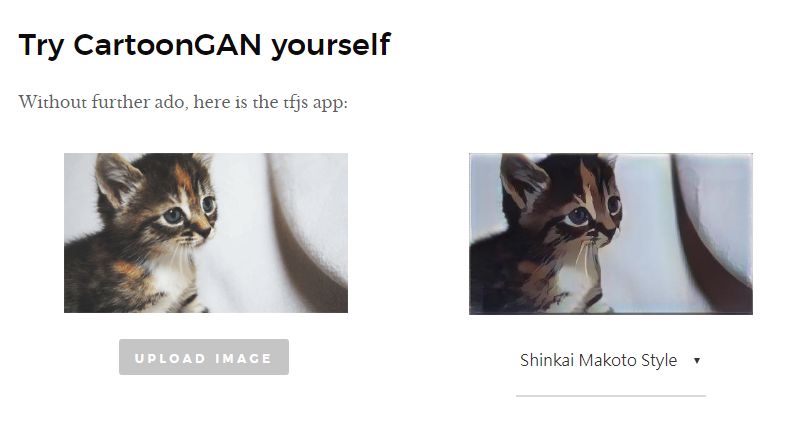
如果你不想自己训练CartoonGAN(但是又想要生成卡通图像),你可以访问CartoonGAN的演示DEMO或运行colab笔记本。
注意DEMO在文章的以下位置哦:(小编电脑测试到浏览器崩溃,就不放体验图了)
3种使用CartoonGAN的方法
在项目中,有3种方法可以生成卡通风格的图像:
1.Cartoonize using TensorFlow.js
在浏览器上使用TensorFlow.js对图像进行卡通化,无需进行任何设置
2.Cartoonize using Colab Notebook
Google Colab可以让我们使用免费的GPU更快地将图像卡通化
3.Clone this repo and run script
适合专业用户和那些想要使本项目更好的人:)
如果你想查看由CartoonGAN生成的更多动漫图像,可查看以下博客文章:
Generate Anime using CartoonGAN and TensorFlow 2.0(English)
用 CartoonGAN 及 TensorFlow 2 生成新海誠與宮崎駿動畫(繁体中文)
若想了解更多内容,可访问Github项目查看。
Github项目地址:https://github.com/mnicnc404/CartoonGan-tensorflow#cartoonize-using-tensorflowjs

