教程 | 如何将模型部署到安卓移动端,这里有一份简单教程
选自Medium
作者:John Olafenwa
机器之心编译
参与:Geek AI、路
本文介绍了如何利用 TensorFlow Mobile 将 PyTorch 和 Keras 模型部署到安卓移动端。
截至 2018 年,全球活跃的安卓设备已经超过了 20 亿部。安卓手机的迅速普及在很大程度上得益于各种各样的智能应用,从地图到图片编辑器无所不有。随着深度学习技术的兴起,移动应用注定会变得更加智能。深度学习加持下的下一代移动应用将专门为你学习和定制功能。微软的「SwiftKey」就是一个很好的例子,它能够通过学习你常用的单词和短语来帮助你更快地打字。
计算机视觉、自然语言处理、语音识别以及语音合成等技术可以极大地提高移动应用程序各个方面的用户体验。幸运的是,人们现在已经开发出了大量工具,用于简化在移动应用中部署和管理深度学习模型的过程。在本文中,作者将向大家介绍如何使用 TensorFlow Mobile 将 Pytorch 和 Keras 模型部署到移动设备上。
使用 TensorFlow Mobile 将模型部署到安卓设备上包括三个步骤:
将训练好的模型转换成 TensorFlow 格式;
向安卓应用添加 TensorFlow Mobile 依赖项;
编写相关的 Java 代码,在你的应用中使用 TensorFlow 模型执行推断。
在本文中,我将带你熟悉以上的整个流程,最终完成一个嵌入图像识别功能的安卓应用。
环境设置
在本教程中,我们将使用 Pytorch 和 Keras,选择你偏好的机器学习框架,并按照说明进行操作。因此,你的环境设置取决于你选择的框架。
第一步,安装 TensorFlow:
pip3 install tensorflow如果你是 PyTorch 开发者,请确保你已经安装了最新版本的 PyTorch。关于安装 PyTorch 的说明,请查阅我早前编写的这篇文章(https://heartbeat.fritz.ai/basics-of-image-classification-with-pytorch-2f8973c51864)。
如果你是一名 Keras 开发者,你可以使用下面的命令安装相关开发环境:
pip3 install keras
pip3 install h5py
Android Studio(精简版 3.0)
https://developer.android.com/studio
将 PyTorch 模型转换为 Keras 模型
本节仅针对于 PyTorch 开发者。如果你使用的是 Keras 框架,你可以直接跳到「将 Keras 模型转换为 TensorFlow 模型」这一节。
我们需要做的第一件事就是将 PyTorch 模型的参数转化为其在 Keras 框架下等价的参数。为了简化这个过程,我编写了一个脚本来自动化地进行这个转换工作。在这篇教程中,我将使用 Squeezenet,这是一种准确率还不错且规模非常小的移动架构。你可以通过这个链接下载预训练好的模型(大小仅仅只有 5mb!):https://download.pytorch.org/models/squeezenet1_1-f364aa15.pth。
在转换权重之前,我们需要在 PyTorch 和 Keras 中定义 Squeezenet 模型。
在两个框架中都定义 Squeezenet,然后使用下面的方法将 PyTorch 框架的权重迁移到 Keras 框架中。
创建一个 convert.py 文件,引入下面的代码,并且运行脚本。
import torch
import torch.nn as nn
from torch.autograd import Variable
import keras.backend as K
from keras.models import *
from keras.layers import *

import torch
from torchvision.models import squeezenet1_1


class PytorchToKeras(object):
    def __init__(self,pModel,kModel):
        super(PytorchToKeras,self)
        self.__source_layers = []
        self.__target_layers = []
        self.pModel = pModel
        self.kModel = kModel

        K.set_learning_phase(0)

    def __retrieve_k_layers(self):

        for i,layer in enumerate(self.kModel.layers):
            if len(layer.weights) > 0:
                self.__target_layers.append(i)

    def __retrieve_p_layers(self,input_size):

        input = torch.randn(input_size)

        input = Variable(input.unsqueeze(0))

        hooks = []

        def add_hooks(module):

            def hook(module, input, output):
                if hasattr(module,"weight"):
                    self.__source_layers.append(module)

            if not isinstance(module, nn.ModuleList) and not isinstance(module,nn.Sequential) and module != self.pModel:
                hooks.append(module.register_forward_hook(hook))

        self.pModel.apply(add_hooks)


        self.pModel(input)
        for hook in hooks:
            hook.remove()

    def convert(self,input_size):
        self.__retrieve_k_layers()
        self.__retrieve_p_layers(input_size)

        for i,(source_layer,target_layer) in enumerate(zip(self.__source_layers,self.__target_layers)):

            weight_size = len(source_layer.weight.data.size())

            transpose_dims = []

            for i in range(weight_size):
                transpose_dims.append(weight_size - i - 1)

            self.kModel.layers[target_layer].set_weights([source_layer.weight.data.numpy().transpose(transpose_dims), source_layer.bias.data.numpy()])

    def save_model(self,output_file):
        self.kModel.save(output_file)
    def save_weights(self,output_file):
        self.kModel.save_weights(output_file)


"""
We explicitly redefine the Squeezent architecture since Keras has no predefined Squeezent
"""

def squeezenet_fire_module(input, input_channel_small=16, input_channel_large=64):

    channel_axis = 3

    input = Conv2D(input_channel_small, (1,1), padding="valid" )(input)
    input = Activation("relu")(input)

    input_branch_1 = Conv2D(input_channel_large, (1,1), padding="valid" )(input)
    input_branch_1 = Activation("relu")(input_branch_1)

    input_branch_2 = Conv2D(input_channel_large, (3, 3), padding="same")(input)
    input_branch_2 = Activation("relu")(input_branch_2)

    input = concatenate([input_branch_1, input_branch_2], axis=channel_axis)

    return input


def SqueezeNet(input_shape=(224,224,3)):


    image_input = Input(shape=input_shape)


    network = Conv2D(64, (3,3), strides=(2,2), padding="valid")(image_input)
    network = Activation("relu")(network)
    network = MaxPool2D( pool_size=(3,3) , strides=(2,2))(network)

    network = squeezenet_fire_module(input=network, input_channel_small=16, input_channel_large=64)
    network = squeezenet_fire_module(input=network, input_channel_small=16, input_channel_large=64)
    network = MaxPool2D(pool_size=(3,3), strides=(2,2))(network)

    network = squeezenet_fire_module(input=network, input_channel_small=32, input_channel_large=128)
    network = squeezenet_fire_module(input=network, input_channel_small=32, input_channel_large=128)
    network = MaxPool2D(pool_size=(3, 3), strides=(2, 2))(network)

    network = squeezenet_fire_module(input=network, input_channel_small=48, input_channel_large=192)
    network = squeezenet_fire_module(input=network, input_channel_small=48, input_channel_large=192)
    network = squeezenet_fire_module(input=network, input_channel_small=64, input_channel_large=256)
    network = squeezenet_fire_module(input=network, input_channel_small=64, input_channel_large=256)

    #Remove layers like Dropout and BatchNormalization, they are only needed in training
    #network = Dropout(0.5)(network)

    network = Conv2D(1000, kernel_size=(1,1), padding="valid", name="last_conv")(network)
    network = Activation("relu")(network)

    network = GlobalAvgPool2D()(network)
    network = Activation("softmax",name="output")(network)


    input_image = image_input
    model = Model(inputs=input_image, outputs=network)

    return model


keras_model = SqueezeNet()


#Lucky for us, PyTorch includes a predefined Squeezenet
pytorch_model = squeezenet1_1()

#Load the pretrained model
pytorch_model.load_state_dict(torch.load("squeezenet.pth"))

#Time to transfer weights

converter = PytorchToKeras(pytorch_model,keras_model)
converter.convert((3,224,224))

#Save the weights of the converted keras model for later use
converter.save_weights("squeezenet.h5")
在完成了上述权重转换工作后,你现在只需将 Keras 模型保存为 squeezenet.h5。此时,我们可以将 PyTorch 模型抛在脑后,继续进行我们的下一步工作。
将 Keras 模型转化为 TensorFlow 模型
此时,你已经有了一个从 PyTorch 模型转换而来的 Keras 模型,或者直接使用 Keras 训练得到的模型。你可以通过这里的链接(https://github.com/OlafenwaMoses/ImageAI/releases/download/1.0/squeezenetweightstfdimorderingtfkernels.h5)下载预训练好的 Keras Squeezenet 模型。下一步,将整个模型架构和权重转换成一个可用于实际生产的 TensorFlow 模型。
创建一个新的 ConvertToTensorflow.py 文件,添加以下代码。
from keras.models import Model
from keras.layers import *
import os
import tensorflow as tf


def keras_to_tensorflow(keras_model, output_dir, model_name,out_prefix="output_", log_tensorboard=True):

    if os.path.exists(output_dir) == False:
        os.mkdir(output_dir)

    out_nodes = []

    for i in range(len(keras_model.outputs)):
        out_nodes.append(out_prefix + str(i + 1))
        tf.identity(keras_model.output[i], out_prefix + str(i + 1))

    sess = K.get_session()

    from tensorflow.python.framework import graph_util, graph_io

    init_graph = sess.graph.as_graph_def()

    main_graph = graph_util.convert_variables_to_constants(sess, init_graph, out_nodes)

    graph_io.write_graph(main_graph, output_dir, name=model_name, as_text=False)

    if log_tensorboard:
        from tensorflow.python.tools import import_pb_to_tensorboard

        import_pb_to_tensorboard.import_to_tensorboard(
            os.path.join(output_dir, model_name),
            output_dir)


"""
We explicitly redefine the Squeezent architecture since Keras has no predefined Squeezenet
"""

def squeezenet_fire_module(input, input_channel_small=16, input_channel_large=64):

    channel_axis = 3

    input = Conv2D(input_channel_small, (1,1), padding="valid" )(input)
    input = Activation("relu")(input)

    input_branch_1 = Conv2D(input_channel_large, (1,1), padding="valid" )(input)
    input_branch_1 = Activation("relu")(input_branch_1)

    input_branch_2 = Conv2D(input_channel_large, (3, 3), padding="same")(input)
    input_branch_2 = Activation("relu")(input_branch_2)

    input = concatenate([input_branch_1, input_branch_2], axis=channel_axis)

    return input


def SqueezeNet(input_shape=(224,224,3)):


    image_input = Input(shape=input_shape)


    network = Conv2D(64, (3,3), strides=(2,2), padding="valid")(image_input)
    network = Activation("relu")(network)
    network = MaxPool2D( pool_size=(3,3) , strides=(2,2))(network)

    network = squeezenet_fire_module(input=network, input_channel_small=16, input_channel_large=64)
    network = squeezenet_fire_module(input=network, input_channel_small=16, input_channel_large=64)
    network = MaxPool2D(pool_size=(3,3), strides=(2,2))(network)

    network = squeezenet_fire_module(input=network, input_channel_small=32, input_channel_large=128)
    network = squeezenet_fire_module(input=network, input_channel_small=32, input_channel_large=128)
    network = MaxPool2D(pool_size=(3, 3), strides=(2, 2))(network)

    network = squeezenet_fire_module(input=network, input_channel_small=48, input_channel_large=192)
    network = squeezenet_fire_module(input=network, input_channel_small=48, input_channel_large=192)
    network = squeezenet_fire_module(input=network, input_channel_small=64, input_channel_large=256)
    network = squeezenet_fire_module(input=network, input_channel_small=64, input_channel_large=256)

    #Remove layers like Dropout and BatchNormalization, they are only needed in training
    #network = Dropout(0.5)(network)

    network = Conv2D(1000, kernel_size=(1,1), padding="valid", name="last_conv")(network)
    network = Activation("relu")(network)

    network = GlobalAvgPool2D()(network)
    network = Activation("softmax",name="output")(network)


    input_image = image_input
    model = Model(inputs=input_image, outputs=network)

    return model


keras_model = SqueezeNet()

keras_model.load_weights("squeezenet.h5")


output_dir = os.path.join(os.getcwd(),"checkpoint")

keras_to_tensorflow(keras_model,output_dir=output_dir,model_name="squeezenet.pb")

print("MODEL SAVED")
上述代码将 squeezenet.pb 保存到了我们的 output_dir 文件夹中。它还在同一个文件夹中创建了 TensorBoard 事件文件。
为了对模型有一个更清晰的理解,你可以在 TensorBoard 中对其可视化。
你需要打开命令提示符,输入:
tensorboard –logdir=output_dir_pathoutput_dir_path 即 output_dir 的路径。
当你成功启动 TensorBoard 后,你将看到下面的对话框,请求你打开 COMPUTER_NAME:6006 的 url 链接。

在你最喜欢的浏览器中输入 URL 地址,会显示出下图所示的界面。
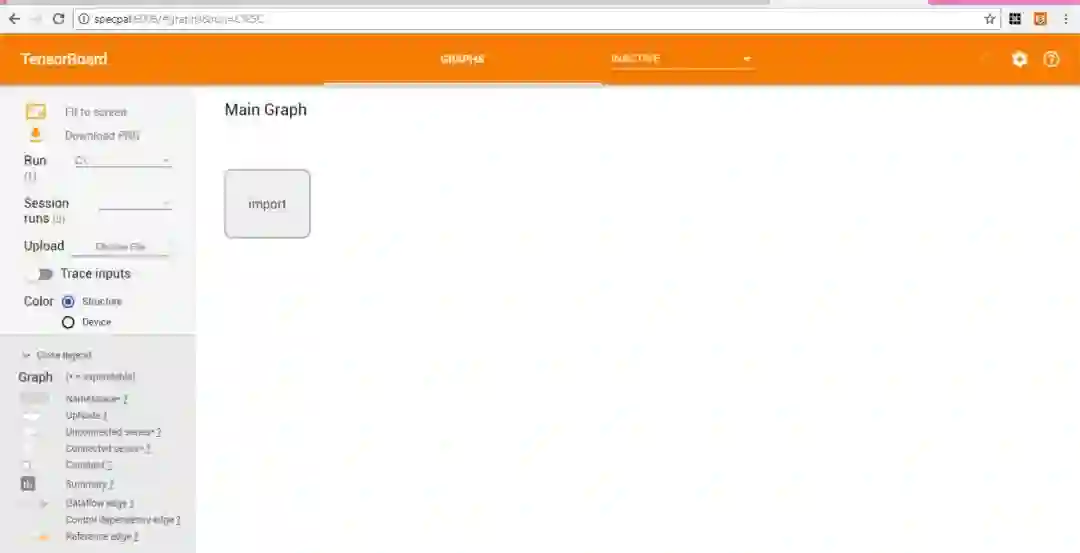
请双击 IMPORT 来可视化你的模型。
仔细查看模型,并且请注意输入和输出节点的名字(架构中的第一个和最后一个节点)。
如果你像我在前面的代码中那样命名你的网络层,那么它们的名称应该分别是 input_1 和 output_1。
至此,我们的模型已经完全准备就绪,可以进行部署了。
将 TensorFLow Mobile 添加到你的项目中
TensorFlow 有两个移动程序库——「TensorFlow Mobile」和「TensorFlow Lite」。Lite 版本是为极小规模的模型设计的,整个依赖项仅占用大约 1Mb 的空间。Lite 中的模型也经过了更好的优化。最近,在安卓 8 及更高版本中,TensorFlow Lite 使用安卓神经网络 API 进行加速。然而,与「TensorFlow Mobile」不同,Lite 并不能直接用于生产,因为其中一些层的表现可能没有如预期一样好。此外,Windows 系统至今还不支持对 Lite 库的编译,以及将其模型转换为本地格式。因此,在这篇教程中,我坚持使用 TensorFlow Mobile。
接下来,如果你没有现有的安卓项目,请在 Android Studio 中创建一个。在你的 build.gradle 文件中添加 TensorFlow Mobile 依赖。
implementation ‘org.tensorflow:tensorflow-android:+’Android Studio 将向你提示同步 gradle(一种项目自动化构建开源工具)。点击 Sync Now,等待同步完成。
此时,你的环境就已经完全设置好了。
在移动 app 中执行推断
在编写代码进行实际推断之前,你需要将转换后的模型(squeezenet.pb)添加到应用程序的资源文件夹中。在 Android Studio 中,右键点击你的项目,跳转至「Add Folder」(添加文件夹)部分,并选择「Assets Folder」(资源文件夹)。这将在你的应用程序目录中创建一个资源文件夹。接下来,你需要将模型复制到资源文件夹中。
你可以通过这个链接(https://github.com/johnolafenwa/Pytorch-Keras-ToAndroid/raw/master/android-sample/app/src/main/assets/labels.json)下载类标签,并且将文件复制到资源文件夹中。
现在你的项目已经包含了进行图像分类所需的一切。
将一个新的 Java 类添加到项目的主程序包中,并将其命名为 ImageUtils,把下面的代码复制到其中。
package com.specpal.mobileai;
import android.content.res.AssetManager;
import android.graphics.Bitmap;
import android.graphics.Canvas;
import android.graphics.Matrix;
import android.os.Environment;
import java.io.File;
import java.io.FileOutputStream;
import java.io.InputStream;
import org.json.*;

/**
 * Utility class for manipulating images.
 **/
public class ImageUtils {
    /**
     * Returns a transformation matrix from one reference frame into another.
     * Handles cropping (if maintaining aspect ratio is desired) and rotation.
     *
     * @param srcWidth Width of source frame.
     * @param srcHeight Height of source frame.
     * @param dstWidth Width of destination frame.
     * @param dstHeight Height of destination frame.
     * @param applyRotation Amount of rotation to apply from one frame to another.
     *  Must be a multiple of 90.
     * @param maintainAspectRatio If true, will ensure that scaling in x and y remains constant,
     * cropping the image if necessary.
     * @return The transformation fulfilling the desired requirements.
     */
    public static Matrix getTransformationMatrix(
            final int srcWidth,
            final int srcHeight,
            final int dstWidth,
            final int dstHeight,
            final int applyRotation,
            final boolean maintainAspectRatio) {
        final Matrix matrix = new Matrix();

        if (applyRotation != 0) {
            // Translate so center of image is at origin.
            matrix.postTranslate(-srcWidth / 2.0f, -srcHeight / 2.0f);

            // Rotate around origin.
            matrix.postRotate(applyRotation);
        }

        // Account for the already applied rotation, if any, and then determine how
        // much scaling is needed for each axis.
        final boolean transpose = (Math.abs(applyRotation) + 90) % 180 == 0;

        final int inWidth = transpose ? srcHeight : srcWidth;
        final int inHeight = transpose ? srcWidth : srcHeight;

        // Apply scaling if necessary.
        if (inWidth != dstWidth || inHeight != dstHeight) {
            final float scaleFactorX = dstWidth / (float) inWidth;
            final float scaleFactorY = dstHeight / (float) inHeight;

            if (maintainAspectRatio) {
                // Scale by minimum factor so that dst is filled completely while
                // maintaining the aspect ratio. Some image may fall off the edge.
                final float scaleFactor = Math.max(scaleFactorX, scaleFactorY);
                matrix.postScale(scaleFactor, scaleFactor);
            } else {
                // Scale exactly to fill dst from src.
                matrix.postScale(scaleFactorX, scaleFactorY);
            }
        }

        if (applyRotation != 0) {
            // Translate back from origin centered reference to destination frame.
            matrix.postTranslate(dstWidth / 2.0f, dstHeight / 2.0f);
        }

        return matrix;
    }


    public static Bitmap processBitmap(Bitmap source,int size){

        int image_height = source.getHeight();
        int image_width = source.getWidth();

        Bitmap croppedBitmap = Bitmap.createBitmap(size, size, Bitmap.Config.ARGB_8888);

        Matrix frameToCropTransformations = getTransformationMatrix(image_width,image_height,size,size,0,false);
        Matrix cropToFrameTransformations = new Matrix();
        frameToCropTransformations.invert(cropToFrameTransformations);

        final Canvas canvas = new Canvas(croppedBitmap);
        canvas.drawBitmap(source, frameToCropTransformations, null);

        return croppedBitmap;


    }

    public static float[] normalizeBitmap(Bitmap source,int size,float mean,float std){

        float[] output = new float[size * size * 3];

        int[] intValues = new int[source.getHeight() * source.getWidth()];

        source.getPixels(intValues, 0, source.getWidth(), 0, 0, source.getWidth(), source.getHeight());
        for (int i = 0; i < intValues.length; ++i) {
            final int val = intValues[i];
            output[i * 3] = (((val >> 16) & 0xFF) - mean)/std;
            output[i * 3 + 1] = (((val >> 8) & 0xFF) - mean)/std;
            output[i * 3 + 2] = ((val & 0xFF) - mean)/std;
        }

        return output;

    }

    public static Object[] argmax(float[] array){


        int best = -1;
        float best_confidence = 0.0f;

        for(int i = 0;i < array.length;i++){

            float value = array[i];

            if (value > best_confidence){

                best_confidence = value;
                best = i;
            }
        }


        return new Object[]{best,best_confidence};


    }


    public static String getLabel( InputStream jsonStream,int index){
        String label = "";
        try {

            byte[] jsonData = new byte[jsonStream.available()];
            jsonStream.read(jsonData);
            jsonStream.close();

            String jsonString = new String(jsonData,"utf-8");

            JSONObject object = new JSONObject(jsonString);

            label = object.getString(String.valueOf(index));


        }
        catch (Exception e){


        }
        return label;
    }
}
如果你并不理解上面的大部分代码,那也没事——这是 TensorFlow Mobile 核心库中没有实现的两个标准函数。因此,借助官方示例的帮助,我写下了它们,以方便后续操作的便捷进行。
在你的主活动(main activity)中创建 ImageView 和 TextView。它们将被用于显示图像和预测结果。
在主活动中,你需要加载 TensorFlow-inference 库,并且初始化一些类变量。在 onCreat 方法前添加以下内容:
 //Load the tensorflow inference library
    static {
        System.loadLibrary("tensorflow_inference");
    }

    //PATH TO OUR MODEL FILE AND NAMES OF THE INPUT AND OUTPUT NODES
    private String MODEL_PATH = "file:///android_asset/squeezenet.pb";
    private String INPUT_NAME = "input_1";
    private String OUTPUT_NAME = "output_1";
    private TensorFlowInferenceInterface tf;

    //ARRAY TO HOLD THE PREDICTIONS AND FLOAT VALUES TO HOLD THE IMAGE DATA
    float[] PREDICTIONS = new float[1000];
    private float[] floatValues;
    private int[] INPUT_SIZE = {224,224,3};

    ImageView imageView;
    TextView resultView;
    Snackbar progressBar;
添加一个计算预测类的函数:
//FUNCTION TO COMPUTE THE MAXIMUM PREDICTION AND ITS CONFIDENCE
    public Object[] argmax(float[] array){


        int best = -1;
        float best_confidence = 0.0f;

        for(int i = 0;i < array.length;i++){

            float value = array[i];

            if (value > best_confidence){

                best_confidence = value;
                best = i;
            }
        }

        return new Object[]{best,best_confidence};


    }
添加接收图像位图并对其进行推断的函数:
public void predict(final Bitmap bitmap){


        //Runs inference in background thread
        new AsyncTask<Integer,Integer,Integer>(){

            @Override

            protected Integer doInBackground(Integer ...params){

                //Resize the image into 224 x 224
                Bitmap resized_image = ImageUtils.processBitmap(bitmap,224);

                //Normalize the pixels
                floatValues = ImageUtils.normalizeBitmap(resized_image,224,127.5f,1.0f);

                //Pass input into the tensorflow
                tf.feed(INPUT_NAME,floatValues,1,224,224,3);

                //compute predictions
                tf.run(new String[]{OUTPUT_NAME});

                //copy the output into the PREDICTIONS array
                tf.fetch(OUTPUT_NAME,PREDICTIONS);

                //Obtained highest prediction
                Object[] results = argmax(PREDICTIONS);


                int class_index = (Integer) results[0];
                float confidence = (Float) results[1];


                try{

                    final String conf = String.valueOf(confidence * 100).substring(0,5);

                    //Convert predicted class index into actual label name
                   final String label = ImageUtils.getLabel(getAssets().open("labels.json"),class_index);


                   //Display result on UI
                    runOnUiThread(new Runnable() {
                        @Override
                        public void run() {

                            progressBar.dismiss();
                            resultView.setText(label + " : " + conf + "%");

                        }
                    });

                }

                catch (Exception e){


                }


                return 0;
            }


        }.execute(0);

    }
上述代码在后台线程中执行预测工作,并且将预测出的类和它的置信度写入我们之前定义的 TextView 文件中。
请注意,在主用户界面(UI)线程上执行推断可能会挂起应用程序。一般而言,我们总是在后台线程执行推断工作。
为了将本教程的重点放在图像识别的主题上,我简单地使用了一张添加到资源文件夹中的鸟的图像。在标准应用程序中,你应该编写代码从文件系统中加载图片。
你可以向资源文件夹添加任何你想要预测的图像。为了进行一次真实的预测,在下面的代码中,我们为一个按钮添加了一个点击事件的监听器。这个监听器仅仅加载图片并且调用预测函数。
 @Override
    protected void onCreate(Bundle savedInstanceState) {
        super.onCreate(savedInstanceState);
        setContentView(R.layout.activity_main);


        Toolbar toolbar = (Toolbar) findViewById(R.id.toolbar);
        setSupportActionBar(toolbar);


        //initialize tensorflow with the AssetManager and the Model
        tf = new TensorFlowInferenceInterface(getAssets(),MODEL_PATH);

        imageView = (ImageView) findViewById(R.id.imageview);
        resultView = (TextView) findViewById(R.id.results);

        progressBar = Snackbar.make(imageView,"PROCESSING IMAGE",Snackbar.LENGTH_INDEFINITE);


        final FloatingActionButton predict = (FloatingActionButton) findViewById(R.id.predict);
        predict.setOnClickListener(new View.OnClickListener() {
            @Override
            public void onClick(View view) {


                try{

                    //READ THE IMAGE FROM ASSETS FOLDER
                    InputStream imageStream = getAssets().open("testimage.jpg");

                    Bitmap bitmap = BitmapFactory.decodeStream(imageStream);

                    imageView.setImageBitmap(bitmap);

                    progressBar.show();

                    predict(bitmap);
                }
                catch (Exception e){

                }

            }
        });
    }
现在,我们大功告成了!再仔细检查一遍,以确保你正确地完成了每一步。如果一切正常,请点击「Build APK」(构建安卓安装包)。
稍等片刻,你的安装包就构建好了。你可以安装 APK,运行该应用程序。
运行结果如下:

要想获得更令人兴奋的体验,你应该实现一些新功能,从安卓文件系统加载图像,或者使用相机获取图像,而不是使用资源文件夹。
总结
移动端的深度学习最终将改变我们构建和使用 app 的方式。通过上面的代码片段,你可以很容易地将训练好的 PyTorch 和 Keras 模型导出到 TensorFlow 环境下。借助于 TensorFlow Mobile 的强大功能,并且按照本文中介绍的步骤,你可以为自己的移动应用程序无缝注入优秀的人工智能功能。
安卓项目的全部代码和模型转换器可以在我的 GitHub 上(https://github.com/johnolafenwa/Pytorch-Keras-ToAndroid)获得。

原文链接:https://heartbeat.fritz.ai/deploying-pytorch-and-keras-models-to-android-with-tensorflow-mobile-a16a1fb83f2
本文为机器之心编译,转载请联系原作者获得授权。
✄------------------------------------------------
加入机器之心(全职记者 / 实习生):hr@jiqizhixin.com
投稿或寻求报道:content@jiqizhixin.com
广告 & 商务合作:bd@jiqizhixin.com