社区分享 | 用 PoseNet + TensorFlow.js 在浏览器实现体感游戏
文 / Charlie Gerard,Google Developers Expert
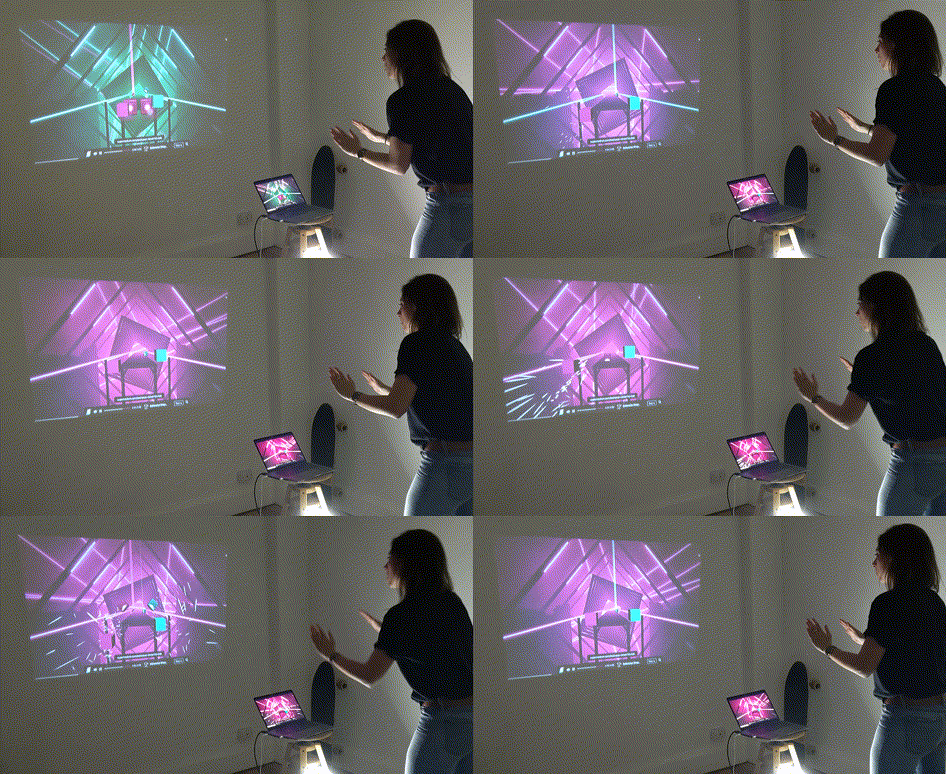
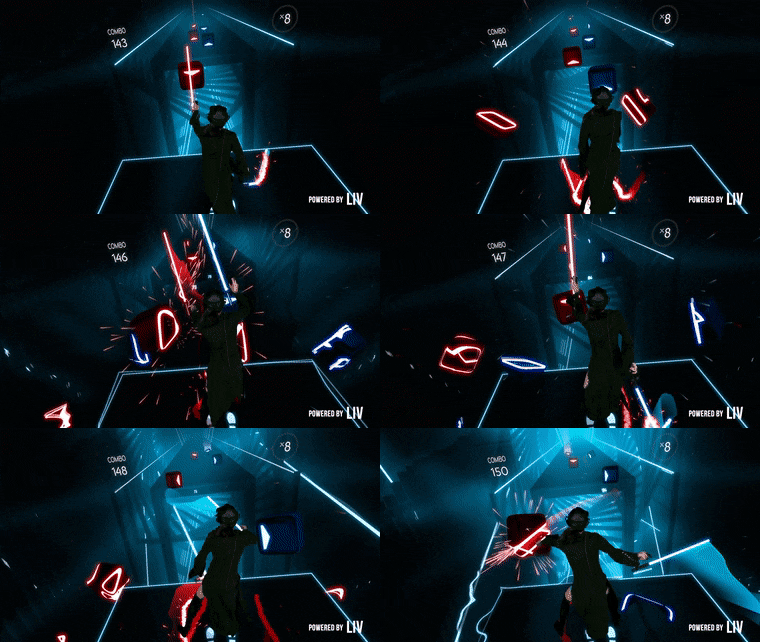
注:VR 游戏是近几年兴起的新类型游戏,玩家穿戴 VR 设备后可以身临其境的感受到游戏的魅力。由于没有 VR 设备,本文作者没玩过太多 VR 游戏,但她在试玩过节奏光剑(Beat Saber)后喜欢上了这款游戏,并尝试自己实现。
这些 VR 的游戏设备价格昂贵,并非每个人都能玩得起 
最终结果演示:
步骤 1 逆向工程
CTRL
+
Option
/
Alt
+
I
切换检查器,但仍然无法帮助我找到所需的元素。
beat
组件具有
destroyBeat 方
法,这就是我正寻找的!这个方法是正常游戏时,玩家击中“节拍”后会触发的方法。
beat
组件中快速进行了修改,只要点击页面就可以触发
destroyBeat
函数(开挂之百发百中),如下所示:
document.body.onclick = () => this.destroyBeat();
现在,我对下一步该如何进行有了头绪,我开始研究 PoseNet,以查看可以使用哪种数据。
步骤 2 使用 PoseNet 追踪身体移动
基于 Tensorflow.js 实现的 PoseNet 模型允许您在浏览器中进行姿势估计,并获取一些关键点的信息,例如肩膀,手臂,手腕的位置。
<script src="https://cdn.jsdelivr.net/npm/@tensorflow/tfjs"></script>
<script src="https://cdn.jsdelivr.net/npm/@tensorflow-models/posenet"></script>
   <video id="video" playsinline style=" -moz-transform: scaleX(-1);
    -o-transform: scaleX(-1);
    -webkit-transform: scaleX(-1);
    transform: scaleX(-1);
    ">
    </video>
    <canvas id="output" style="position: absolute; top: 0; left: 0; z-index: 1;"></canvas>
首先,我们需要设置 PoseNet。
// 新建一个对象并设置我们想要的模型参数
const poseNetState = {
  algorithm: 'single-pose',
  input: {
    architecture: 'MobileNetV1',
    outputStride: 16,
    inputResolution: 513,
    multiplier: 0.75,
    quantBytes: 2
  },
  singlePoseDetection: {
    minPoseConfidence: 0.1,
    minPartConfidence: 0.5,
  },
  output: {
    showVideo: true,
    showPoints: true,
  },
};

// 加载模型
let poseNetModel = await posenet.load({
    architecture: poseNetState.input.architecture,
    outputStride: poseNetState.input.outputStride,
    inputResolution: poseNetState.input.inputResolution,
    multiplier: poseNetState.input.multiplier,
    quantBytes: poseNetState.input.quantBytes
});
成功加载模型后,我们实例化视频流:
let video;

try {
  video = await setupCamera();
  video.play();
} catch (e) {
  throw e;
}

async function setupCamera() {
  const video = document.getElementById('video');
  video.width = videoWidth;
  video.height = videoHeight;

  const stream = await navigator.mediaDevices.getUserMedia({
    'audio': false,
    'video': {
      width: videoWidth,
      height: videoHeight,
    },
  });
  video.srcObject = stream;

  return new Promise((resolve) => {
    video.onloadedmetadata = () => resolve(video);
  });
}
视频流准备好之后,我们开始姿势检测:
function detectPoseInRealTime(video) {
  const canvas = document.getElementById('output');
  const ctx = canvas.getContext('2d');
  const flipPoseHorizontal = true;

  canvas.width = videoWidth;
  canvas.height = videoHeight;

  async function poseDetectionFrame() {
    let poses = [];
    let minPoseConfidence;
    let minPartConfidence;

    switch (poseNetState.algorithm) {
      case 'single-pose':
        const pose = await poseNetModel.estimatePoses(video, {
          flipHorizontal: flipPoseHorizontal,
          decodingMethod: 'single-person'
        });
        poses = poses.concat(pose);
        minPoseConfidence = +poseNetState.singlePoseDetection.minPoseConfidence;
        minPartConfidence = +poseNetState.singlePoseDetection.minPartConfidence;
        break;
    }

    ctx.clearRect(0, 0, videoWidth, videoHeight);

    if (poseNetState.output.showVideo) {
      ctx.save();
      ctx.scale(-1, 1);
      ctx.translate(-videoWidth, 0);
      ctx.restore();
    }

    poses.forEach(({score, keypoints}) => {
      if (score >= minPoseConfidence) {
        if (poseNetState.output.showPoints) {
          drawKeypoints(keypoints, minPartConfidence, ctx);
        }
      }
    });
    requestAnimationFrame(poseDetectionFrame);
  }

  poseDetectionFrame();
}
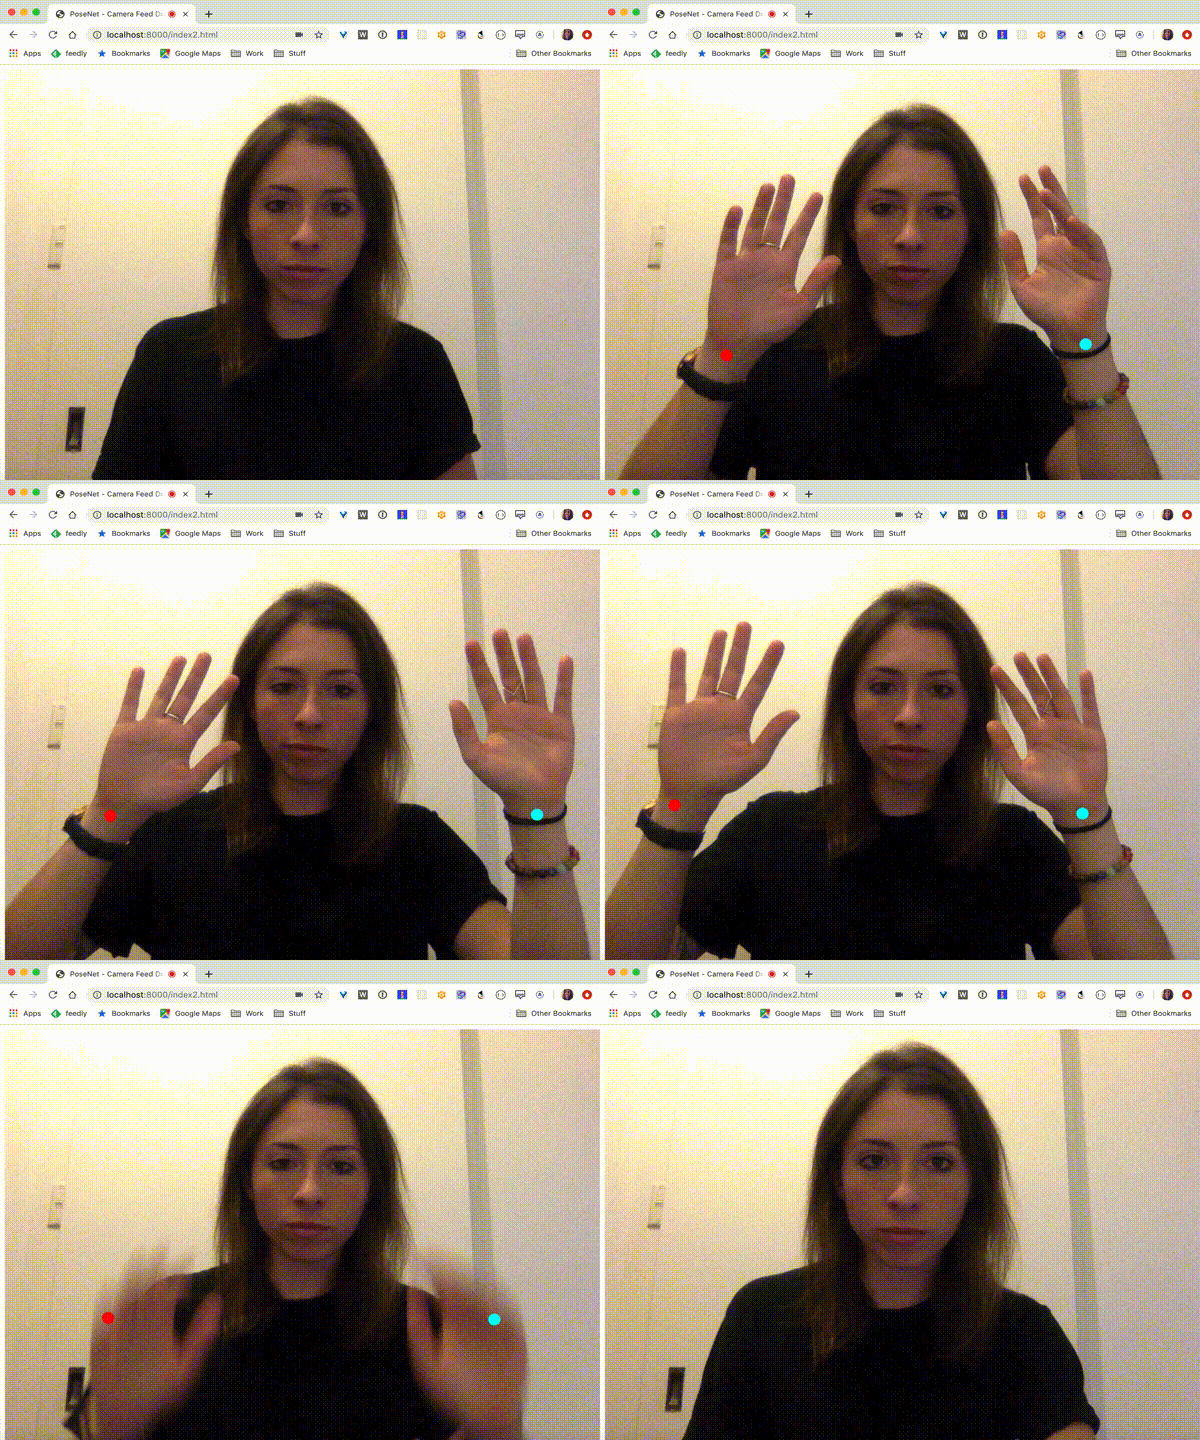
在上面的示例中,我们调用 drawKeypoints 函数在手掌上方的画布上绘制点。代码如下:
function drawKeypoints(keypoints, minConfidence, ctx, scale = 1) {
    let leftWrist = keypoints.find(point => point.part === 'leftWrist');
    let rightWrist = keypoints.find(point => point.part === 'rightWrist');

    if (leftWrist.score > minConfidence) {
        const {y, x} = leftWrist.position;
        drawPoint(ctx, y * scale, x * scale, 10, colorLeft);
    }

    if (rightWrist.score > minConfidence) {
        const {y, x} = rightWrist.position;
        drawPoint(ctx, y * scale, x * scale, 10, colorRight);
    }
}

function drawPoint(ctx, y, x, r, color) {
  ctx.beginPath();
  ctx.arc(x, y, r, 0, 2 * Math.PI);
  ctx.fillStyle = color;
  ctx.fill();
}
结果如下:
现在,追踪功能已独立完成。我们继续加油,将其添加到 BeatSaver 代码库中。
步骤 3 将姿势追踪添加至 BeatSaver
在这个阶段,我们应该获得以下反馈:
(x,y)
坐标当做
3D
对象的
(x,y)
坐标。
映射 2D 和 3D 坐标
在 A-Frame 中,我们可以创建所谓的实体组件(entity component):一个可以添加到场景中的自定义占位符对象。
创建自定义 3D 对象
let el, self;

AFRAME.registerComponent('right-hand-controller', {
    schema: {
        width: {type: 'number', default: 1},
        height: {type: 'number', default: 1},
        depth: {type: 'number', default: 1},
        color: {type: 'color', default: '#AAA'},
    },
    init: function () {
        var data = this.data;
        el = this.el;
        self = this;

        this.geometry = new THREE.BoxGeometry(data.width, data.height, data.depth);
        this.material = new THREE.MeshStandardMaterial({color: data.color});
        this.mesh = new THREE.Mesh(this.geometry, this.material);
        el.setObject3D('mesh', this.mesh);
    }
});
a-entity
标签。
<a-entity id="right-hand" right-hand-controller="width: 0.1; height: 0.1; depth: 0.1; color: #036657" position="1 1 -0.2"></a-entity>
在上面的代码中,我们新建了一个类型为 right-hand-controller 的实体,并为其设置一些特性。
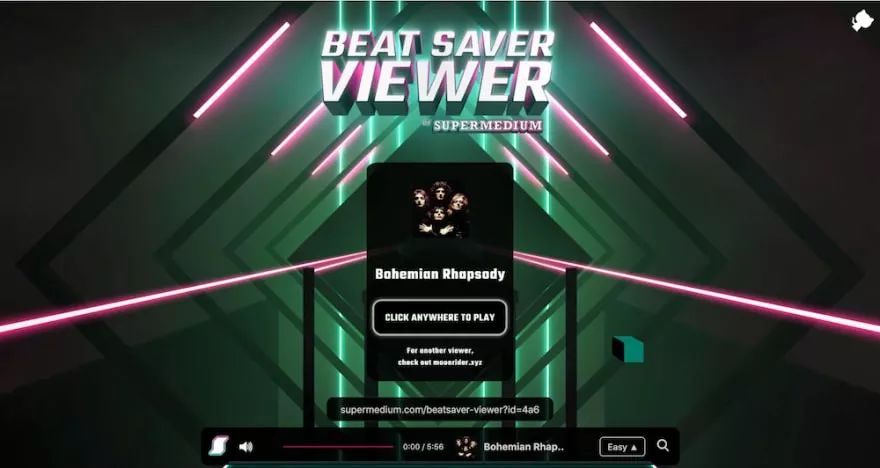
现在,我们应该可以在页面上看到一个立方体,如图中右下方,那个小小的绿色立方体:
// 这个函数只有在组件初始化完成,并且一个属性更新后才会运行
update: function(){
  this.checkHands();
},
checkHands: function getHandsPosition() {
  // 如果从 PoseNet 获得的右手位置与先前的不同,那么触发 onHandMove 函数
  if(rightHandPosition && rightHandPosition !== previousRightHandPosition){
    self.onHandMove();
    previousRightHandPosition = rightHandPosition;
  }
  window.requestAnimationFrame(getHandsPosition);
},
onHandMove: function(){
  // 首先创建一个三维向量用以储存手部的值,值是从 PoseNet 检测手部并根据屏幕上的位置转换而来
  const handVector = new THREE.Vector3();
  handVector.x = (rightHandPosition.x / window.innerWidth) * 2 - 1;
  handVector.y = - (rightHandPosition.y / window.innerHeight) * 2 + 1;
  handVector.z = 0; // z 值可以直接设为0,因为我们无法通过摄像头获取真实的景深

  // 获得摄像头元素并用摄像头的映射矩阵“逆映射”我们的手部向量(总之是个黑科技,我也说不清)
  const camera = self.el.sceneEl.camera;
  handVector.unproject(camera);

  // 获得摄像头对象的位置
  const cameraObjectPosition = camera.el.object3D.position;
  // 接下来的三行便是将 2D 屏幕里手部的坐标映射到 3D 游戏世界里
  const dir = handVector.sub(cameraObjectPosition).normalize();
  const distance = - cameraObjectPosition.z / dir.z;
  const pos = cameraObjectPosition.clone().add(dir.multiplyScalar(distance));
  // 我们用下面的新坐标来确定前面提及的立方体 'right-hand-controller' 的 3D 方位
  el.object3D.position.copy(pos);
  el.object3D.position.z = -0.2;
}
在这一阶段,我们可以将手移到摄像头前面,并看到 3D 立方体在移动:
我们需要做的最后一件事是所谓的 光线投射 (Raycasting),以便能够击打“节拍”。
光线投射
onMoveHands
函数中添加以下代码:
// 新建一个针对我们手部向量的光线投射器(Raycaster)
const raycaster = new THREE.Raycaster();
raycaster.setFromCamera(handVector, camera);

// 获取全部 <a-entity beatObject> 元素
const entities = document.querySelectorAll('[beatObject]');
const entitiesObjects = [];

if(Array.from(entities).length){
  // 如果这里有“节拍”实体,那么捕获这些实体,并写入数组
  for(var i = 0; i < Array.from(entities).length; i++){
    const beatMesh = entities[i].object3D.el.object3D.el.object3D.el.object3D.children[0].children[1];
    entitiesObjects.push(beatMesh);
  }

  // 通过光线投射器,检查我们的手部立方体是否穿过了“节拍”实体的外轮廓,即发生碰撞.
  let intersects = raycaster.intersectObjects(entitiesObjects, true);
    if(intersects.length){
      // 如果发生碰撞,获得这个实体以及它的颜色和类型
      const beat = intersects[0].object.el.attributes[0].ownerElement.parentEl.components.beat;
      const beatColor = beat.attrValue.color;
      const beatType = beat.attrValue.type;
      // 如果这个“节拍”实体是蓝色的,并且不是炸弹(即正确击打),那么触发“节拍”被破坏的效果
      if(beatColor === "blue"){
        if(beatType === "arrow" || beatType === "dot"){
          beat.destroyBeat();
        }
      }
    }
}
我们完成了!我们使用 PoseNet 和 Tensorflow.js 来检测手部及其位置,将它们绘制在画布上,将它们映射到 3D 坐标,并使用光线投射器来检测“节拍”的碰撞并击毁它们!🎉 🎉 🎉
我当然还额外花了一些步骤才能弄清楚所有这一切,总而言之这是一个非常有趣的挑战!
局限性
当然,和以往一样,这种游戏方案也存在局限性。接下来将逐一说明:
延迟和准确性
我认为这是意料之中的,但实际上它能以如此快的速度识别我的手腕并计算出应该将它们投射在屏幕上的哪个地方。这已经给我留下了深刻的印象。
环境照明
通常来说,涉及到计算机视觉的应用,都需要良好的照明环境以充分发挥性能。如果房间内的照明不够好,您的任何体验都不会太好甚至完全不可用。这个程序仅使用笔记本电脑上一个小小的摄像头的视频流来查找最接近人体形状的物体,因此,如果光线不足,它将无法做到这一点,并且游戏将无法正常工作。
用户体验
就到这里了!
希望你能够喜欢!❤️✌️
如果您想详细了解 本文讨论 的相关内容,请参阅以下文档。这些文档深入探讨了这篇文章中提及的许多主题:
Beat Saber
https://beatsaber.com/HTC Vive
https://www.vive.com/au/Oculus Rift
https://www.oculus.com/?locale=en_USPlaystation VR
https://www.playstation.com/en-au/explore/playstation-vr/仓库
https://github.com/supermedium/beatsaver-viewerSupermedium
http://supermedium.com/A-Frame
https://aframe.io/实时演示
https://beat-pose.netlify.com/Github 仓库
https://github.com/charliegerard/beat-poseBeatSaver Viewer
https://github.com/supermedium/beatsaver-viewer
PoseNet model
https://github.com/tensorflow/tfjs-models/tree/master/posenet
