Mask-RCNN模型的实现自定义对象(无人机)检测
本文转载自opencv学堂
软件依赖与版本信息:
- tensorflow 1.11
- tensorflow object detection API
- opencv4.1.0
- python 3.6.5
- VS2015

数据标注工具:
https://github.com/abreheret/PixelAnnotationTool
Part.1-数据生成
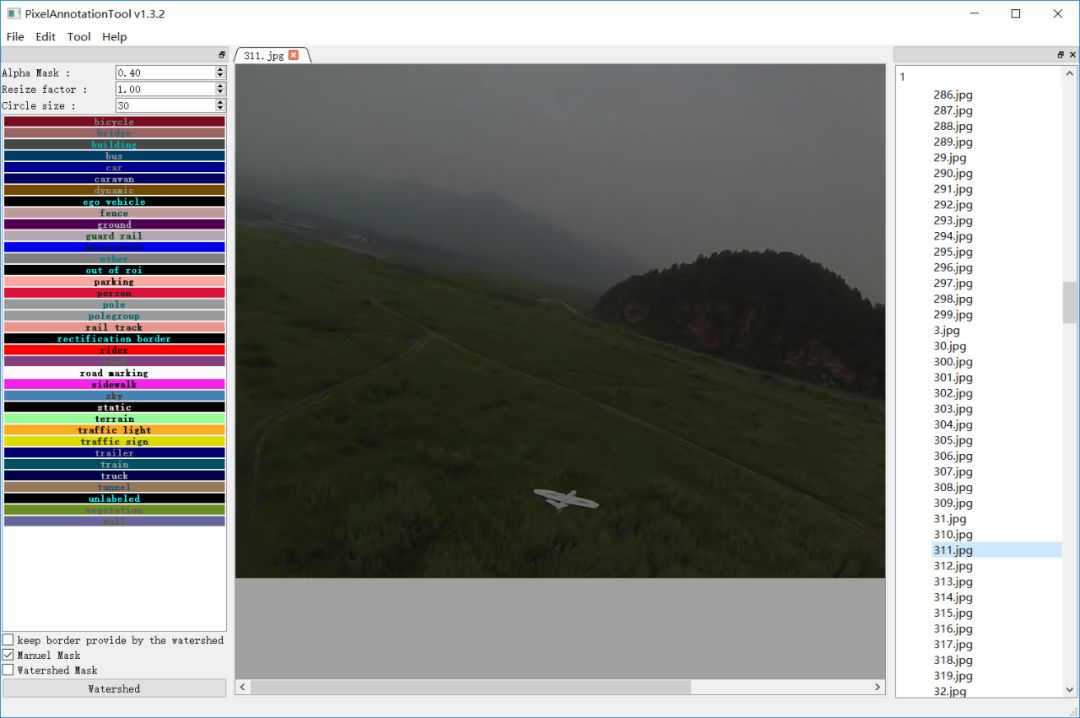
打开标注工具PixelAnnotation 选择好dataset路径之后,顺序开始标注数据即可!
这个工具对每张原始图像会生成三张图像,分别是
IMAGENAME_color_mask.png
IMAGENAME_mask.png
IMAGENAME_watershed_mask.png
这里总计有546张图像,测试数据是一段每秒25帧的视频文件,最终标注完成之后,我们需要的是IMAGENAME_color_mask.png文件,
需要把它重命名为:
IMAGENAME.png
原图与标注之后的mask图像
最终得到的文件结构显示如下
dataset
|---Annotations
|---JPEGImages
|---train_data_dir
|---label_map.pbtxt
解释如下:
dataset 文件夹
Annotations 文件夹,存放的是标注之后mask数据
JPEGImages 文件夹,存放的是原始的JPG格式图像
train_data_dir 运行脚本创建tf record文件所在的目录
label_map.pbtxt 数据的分类JSON描述,这里针对固定翼无人机一个分类
创建tf record数据,
首先需要下载脚本文件create_mask_rcnn_tf_record.py,下载地址为:
https://github.com/vijendra1125/Custom-Mask-RCNN-using-Tensorfow-Object-detection-API放置到tensorflow object detection API框架中的
research\object_detection\dataset_tools
目录下,然后打开修改代码行第57行,标注的每个对象mask都必须索引正确。
然后运行如下
就会得到生成的tf record文件。
上述数据标注与生成过程,只适合单对象的标注,如果有多个对象,请先通过labelImg标注好box框,生成XML标注文件,然后再通过PixelAnnotation生成mask数据。
Part.2-迁移学习
使用迁移学习训练Mask-RCNN实现自定义对象检测,首先需要一个预训练模型,这里使用的的预训练模型为:
mask_rcnn_inception_v2_coco
下载地址为:
http://download.tensorflow.org/models/object_detection/mask_rcnn_inception_v2_coco_2018_01_28.tar.gz修改pipeline_config文件
从object_detection\samples\configs文件夹下找到对应的config文件
- mask_rcnn_inception_v2_coco.config把所有PATH_TO_BE_CONFIGURED地方修改指向真实路径,然后根据需要调整如下几个参数。
keep_aspect_ratio_resizer
-min_dimension
-max_dimension
都修改为 600
-num_classes字段值修改为1,
表示我们只有一个类别
为了防止训练时候资源耗尽导致内存溢出错误,在train_config块中添加以下属性
batch_queue_capacity: 150
num_batch_queue_threads: 8
prefetch_queue_capacity: 10
gradient_clipping_by_norm: 10.0
保存好config文件之后,运行如下命令行开始启动训练
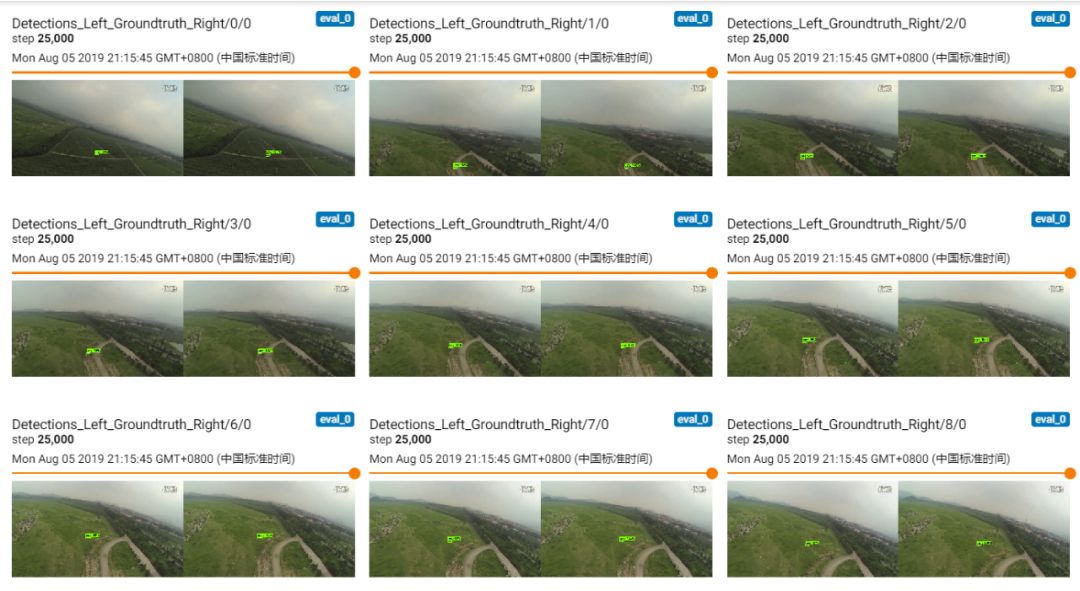
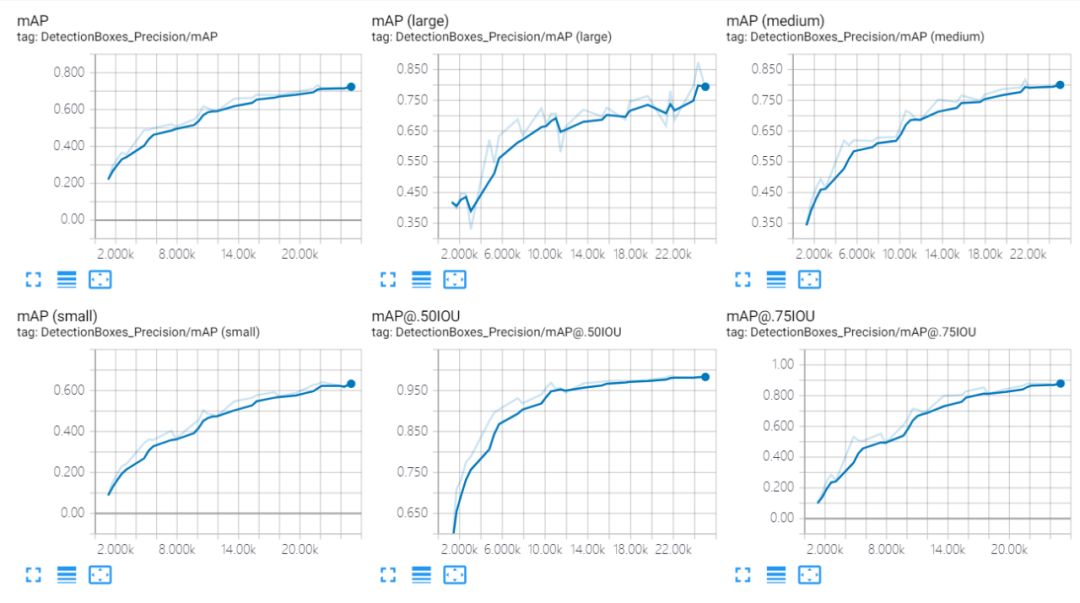
通过tensorboard查看训练
训练结果之后,运行如下脚本导出pb文件
Part.3-代码演示
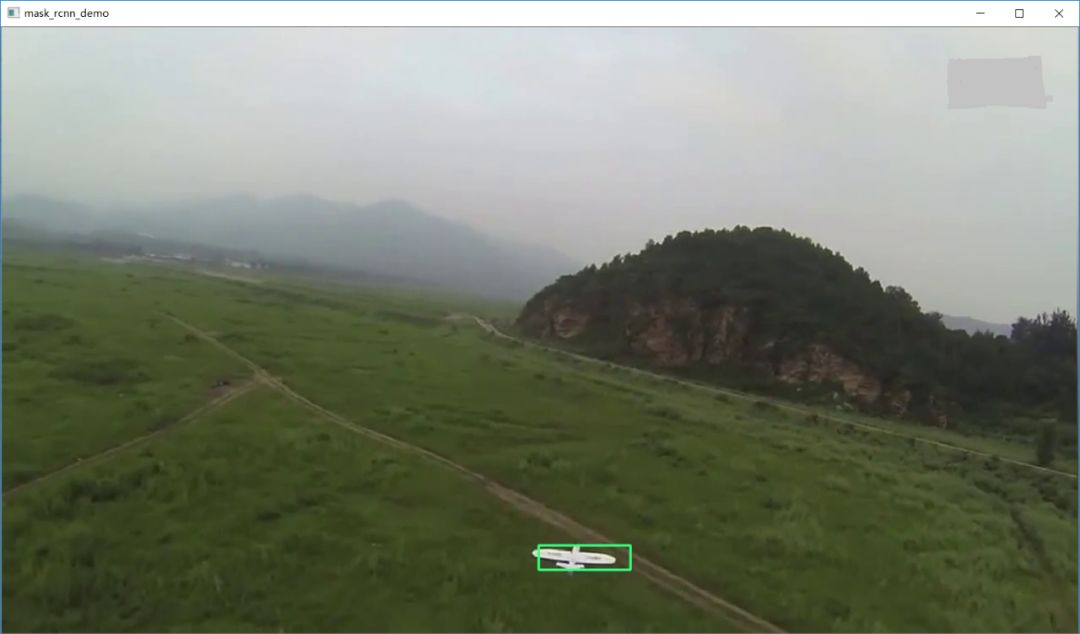
使用导出pb文件,测试结果如下
相关演示代码如下:
import tensorflow as tf
import cv2 as cv

# Read the graph.
model_dir = 'D:/tensorflow/uav_train/export/frozen_inference_graph.pb'
with tf.gfile.FastGFile(model_dir, 'rb') as f:
    graph_def = tf.GraphDef()
    graph_def.ParseFromString(f.read())

cap = cv.VideoCapture("D:/images/video/uav_clip.avi")
vout = cv.VideoWriter("D:/mask_rcnn_demo.mp4", cv.VideoWriter_fourcc('D', 'I', 'V', 'X'), 25,
                     (1280, 720), True)
with tf.Session() as sess:
    # Restore session
    sess.graph.as_default()
    tf.import_graph_def(graph_def, name='')

    # process video stream
    count = 0
    while True:
        ret, img = cap.read()
        if ret is not True:
            break
        rows = img.shape[0]
        cols = img.shape[1]
        inp = cv.resize(img, (600, 600))
        inp = inp[:, :, [2, 1, 0]]  # BGR2RGB

        # Run the model
        out = sess.run([sess.graph.get_tensor_by_name('num_detections:0'),
                        sess.graph.get_tensor_by_name('detection_scores:0'),
                        sess.graph.get_tensor_by_name('detection_boxes:0'),
                        sess.graph.get_tensor_by_name('detection_classes:0')],
                       feed_dict={'image_tensor:0': inp.reshape(1, inp.shape[0], inp.shape[1], 3)})

        # Visualize detected bounding boxes.
        num_detections = int(out[0][0])
        for i in range(num_detections):
            classId = int(out[3][0][i])
            score = float(out[1][0][i])
            bbox = [float(v) for v in out[2][0][i]]
            if score > 0.5:
                x = bbox[1] * cols
                y = bbox[0] * rows
                right = bbox[3] * cols
                bottom = bbox[2] * rows
                cv.rectangle(img, (int(x), int(y)), (int(right), int(bottom)), (125, 255, 51), thickness=2)
        count += 1
        cv.imshow('mask_rcnn_demo', img)
        if 2500 < count < 3500:
            vout.write(img)
        c = cv.waitKey(1)
        if c == 27:
            break

# release resource
vout.release()
cap.release()
参考资料
https://github.com/vijendra1125/Custom-Mask-RCNN-using-Tensorfow-Object-detection-APIhttps://github.com/tensorflow/models/tree/master/research/object_detection
交流群
欢迎加入公众号读者群一起和同行交流,目前有SLAM、算法竞赛、图像检测分割、人脸人体、医学影像、自动驾驶、综合等微信群(以后会逐渐细分),请扫描下面微信号加群,备注:”昵称+学校/公司+研究方向“,例如:”张三 + 上海交大 + 视觉SLAM“。请按照格式备注,否则不予通过。添加成功后会根据研究方向邀请进入相关微信群。请勿在群内发送广告,否则会请出群,谢谢理解~
如有AI领域实习、求职、招聘、项目合作、咨询服务等需求,快来加入我们吧,期待和你建立连接,找人找技术不再难!
推荐阅读
最新AI干货,我在看
