Windows操作系统全面兼容机器人操作系统ROS1和ROS2
微软Windows操作系统全面兼容机器人操作系统ROS1和ROS

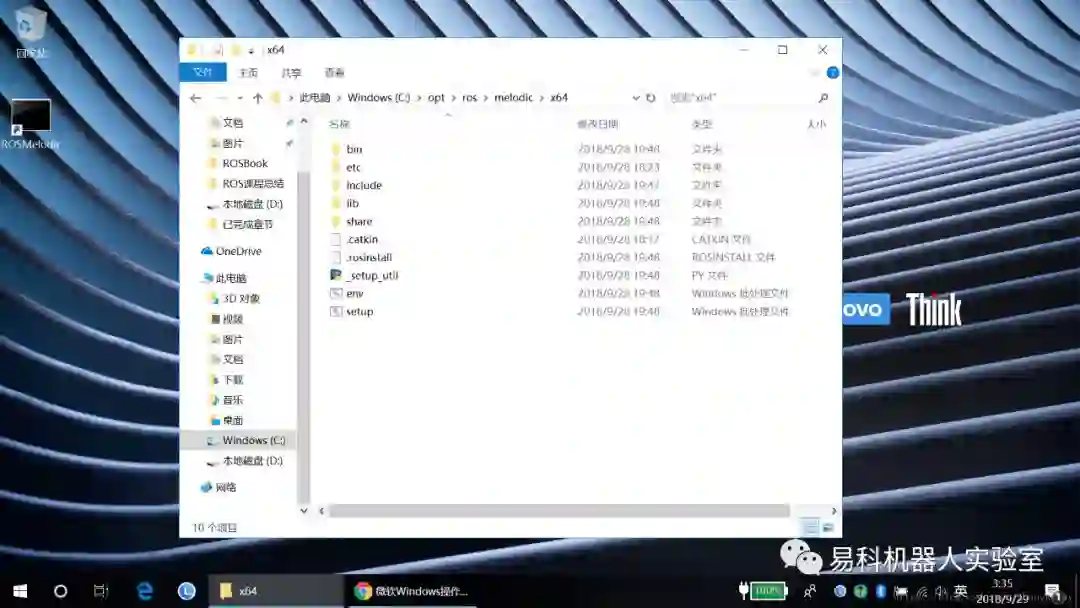
安装在/opt/ros/melodic/x64文件夹下,依据如下教程即可安装成功。
ROS官网链接:http://wiki.ros.org/Installation/Windows
----
Turtlebot 3
Getting Started with the Turtlebot 3 running Windows. The ROS for Ubuntu documentation is located at the Robotis website . The documentation on this page will describe the differences between Ubuntu and Windows.
Windows Requirements
Windows Software
The Turtlebot 3 uses a Lidar which requires the following driver.
CP2102 Driver
Guide
General notes
The turtlebot documentation uses the unix command 'export' to set environment variables, instead use the following:
set TURTLEBOT3_MODEL=WafflePlease use turtlebot3_bringup-win.launch which has Windows device bindings.
6. Setup
6.1 PC Setup
Please follow the instructions for setting up your computer with ROS on Windows.
6.2 SBC Setup
You can bypass this section
6.3 OpenCR Setup
Please follow the Windows instructions for the Robotis OpenCR board in the Robotis Manual .
Before proceeding, make sure the motors turn by pressing the motor test buttons near the USB connector.
BUG: We're working to identify a sync error coming from rosserial, which ultimately leads to a board reset.
6.4 Compatible devices
ROS on Windows requires a x64 bit Windows 10 Desktop or Windows 10 IoT Enterprise, and compatible hardware.
ROS on Windows was brought up using Up2 and an Intel Nuc.
11 Simulation
As of the September release, Gazebo has not been ported to Windows yet.
Create a new workspace
In a Command Window set up with the ROS environment, create a directory for your robot workspaces and a workspace for turtlebot.
      mkdir c:\ws\turtlebot3\src


      cd c:\ws\turtlebot3\src


      catkin_init_workspace


      git clone -b melodic-devel https://github.com/ROBOTIS-GIT/turtlebot3_msgs


      git clone -b melodic-devel https://github.com/ms-iot/turtlebot3_simulations


      git clone -b melodic-devel https://github.com/ms-iot/turtlebot3.git


      git clone -b melodic-devel https://github.com/ms-iot/hls_lfcd_lds_driver


      cd c:\ws\turtlebot3


      rosdep install --from-paths src --ignore-src -r -y
As of the September release of ros-melodic for Windows, Gazebo has not been ported. Please disable this portion of the build.
echo > turtlebot3_simulations\turtlebot3_gazebo\CATKIN_IGNORECustomize Turtlebot Launch Files
Modify the ROS Launch files to map the devices to the correct COM port. To determine which COM ports you require, right click on the Windows Start Menu, Select Device Manager.
Under the Ports (COM & LPT) node:
USB Serial Debice (COMx) is the OpenCR board.
Silicon Labs CP210x USB to UART Bridge (COMy) is the Lidar
Enter the COM port in the correct fields in the launch files below:
turtlebot3_bringup/launch/turtlebot3_core-win.launch
      <node pkg="rosserial_python" type="serial_node.py" name="turtlebot3_core" output="screen">


      <param name="port" value="COMx"/>
turtlebot3_bringup/launch/turtlebot3_lidar-win.launch
      <node pkg="hls_lfcd_lds_driver" type="hlds_laser_publisher" name="turtlebot3_lds" output="screen">


      <param name="port" value="COMy"/>
Build Nodes
To build the turtlebot packages, enter the turtlebot3 workspace and build using the catkin build system.
      cd c:\ws\turtlebot3


      catkin_make install -DCMAKE_BUILD_TYPE=RelWithDebInfo
Now inform ROS where to find your turtlebot code by merging the turtlebot install environment with the ROS environment. Please ensure you do this every time you open a command window.
c:\ws\turtlebot3\install\setup.batIf you forget to merge the turtlebot environment by calling the setup batch file, you'll get an error such as this:
RLException: [turtlebot3_robot.launch] is neither a launch file in package [turtlebot3_bringup] nor is [turtlebot3_bringup] a launch file name
Running Turtlebot
No Robot - No Problem!
rViz is tool which allows you to visualize a representation of a robot, and project fake data in order to exerise or develop logic. The turtlebot simulation is in the turtlebot3_simulations package.
In one command window, start roscore.
In another command window, start the simulation environment.
roslaunch turtlebot3_simulations turtlebot3_fake.launchYou can create your own logic which reads /odom or publish /cmd_vel to move the virtual robot.
Run Turtlebot3 with Sensors connected to your devlopment machine.
If you have Turtlebot3 hardware, you can plug the sensors directly into your development machine to iterate on fuctionality with your development machine. Perform the steps to set up the launch file for your development system.
In one command window, start roscore.
In another command window, launch the turtlebot robot code.
roslaunch turtlebot3_bringup turtlebot3_robot.launch-----
ROS1链接:https://ros-win.visualstudio.com/ros-win
ROS for Windows
People have always been fascinated by robots. Today advanced robots are changing our lives, both at work and at home. Warehouse robots have enabled next-day deliveries to online shoppers, and many pet owners rely on robotic vacuums to keep their floors clean. Industries as diverse as manufacturing, transportation, healthcare, and real estate are seeing benefits from robots. As robots have advanced, so have the development tools. Many developers leverage the Robot Operating System (ROS) , a set of libraries and tools which help you build complex robots. ROS is used in many cutting-edge robotic projects around the world.
Microsoft is excited to announce an experimental release of ROS1 for Windows. This will bring the manageability and security of Windows 10 IoT Enterprise to the innovative ROS ecosystem.
Windows has been a trusted part of robotic and industrial systems for decades. With ROS for Windows, developers will be able to use the familiar Visual Studio toolset along with rich AI and cloud features. We're looking forward to bringing the intelligent edge to robotics by exposing advanced features like hardware accelerated Windows Machine Learning, computer vision, Azure Cognitive Services, Azure IoT cloud services, and other Microsoft technologies to home, education, commercial, and industrial robots. Manufacturers want to make robots more aware of their surroundings, easier to program and safer to be around. Governments, manufacturers, and academics around the world are investing in the next generation of manufacturing, sometimes referred to as “Industry 4.0”.
Microsoft is working with Open Robotics and the ROS Industrial Consortium to bring the Robot Operating System to Windows. Microsoft has joined the ROS Industrial Consortium whose mission is to extend the advanced capabilities of ROS to manufacturing and improve the productivity and return on investment of industrial robots . At ROSCon 2018 in Madrid, Spain, Microsoft demonstrated a Robotis Turtlebot 3 robot, running the ROS release known as Melodic Morenia, that recognized and steered toward the closest person to the robot. The robot runs Windows 10 IoT Enterprise on an Intel Coffee Lake NUC using a new ROS node which leverages hardware accelerated Windows Machine Learning. Microsoft also showcased a ROS simulation environment running in Azure.It demonstrated a swarm of robots running in a virtual world connected to an orchestration system and controlled via Azure IoT Hub. Microsoft will host the Windows builds for ROS1 and shortly ROS2, as well as provide documentation, development and deployment solutions for Windows.
ROS on Windows is experimental. For more details, visit us at ROSCon 2018
Working with ROS on Windows
Install ROS on Windows
Are you new to ROS?
Learn about the differences between ROS on Windows and ROS on Linux
Porting Status
Getting Started with Turtlebot3
About the Azure DevOps buildfarm for ROS on Windows
Buiding ROS for Windows from Source
Using ROS with Azure
ROS for Azure IoT Hub
ROS2链接:https://github.com/ros2/ros2/wiki/Windows-Install-Binary
Windows Install Binary
Mikael Arguedas edited this page on 25 Aug · 64 revisions
Installing ROS 2 on Windows
This page explains how to install ROS 2 on Windows from a pre-built binary package.
System requirements
As of beta-2 only Windows 10 is supported.
Installing prerequisites
Install Chocolatey
Chocolatey is a package manager for Windows, install it by following their installation instructions:
https://chocolatey.org/
You'll use Chocolatey to install some other developer tools.
Install Python
Open a Command Prompt and type the following to install Python via Chocolatey:
> choco install -y pythonInstall OpenSSL
Download an OpenSSL installer from this page. Scroll to the bottom of the page and download Win64 OpenSSL v1.0.2. Don't download the Win32 or Light versions.
Run the installer with default parameters. Then, define environment variables (the following commands assume you used the default installation directory):
setx -m OPENSSL_CONF C:\OpenSSL-Win64\bin\openssl.cfgAdd
C:\OpenSSL-Win64\bin\to your PATH
Install Visual Studio
Install Visual Studio 2015 if using Ardent or earlier
Install Visual Studio 2017 if using Bouncy or a nightly
Install additional DDS implementations (optional)
ROS 2 builds on top of DDS. It is compatible with multiple DDS or RTPS (the DDS wire protocol) vendors.
The package you downloaded has been built with optional support for multiple vendors: eProsima FastRTPS, Adlink OpenSplice, and (as of ROS 2 Bouncy) RTI Connext as the middleware options. Run-time support for eProsima's Fast RTPS is included bundled by default. If you would like to use one of the other vendors you will need to install their software separately.
Adlink OpenSplice
If you want to use OpenSplice, you will need to download the latest version (for ROS 2 Bouncy we require at least version 6.7.180404OSS-HDE-x86_64.win-vs2017). For ROS 2 releases up to and including Ardent, extract it but do not do anything else at this point. For ROS 2 releases later than Ardent, set the OSPL_HOME environment variable to the unpacked directory that contains the release.bat script.
RTI Connext
To use RTI Connext (available as of ROS 2 Bouncy) you will need to have obtained a license from RTI.
You can install the Windows package of Connext version 5.3.1 provided by RTI from their downloads page.
After installing, run RTI launcher and point it to your license file.
Set the NDDSHOME environment variable:
set "NDDSHOME=C:\Program Files\rti_connext_dds-5.3.1"If you want to install the Connext DDS-Security plugins please refer to this page
Install OpenCV
Some of the examples require OpenCV to be installed.
You can download a precompiled version of OpenCV 3.4.1 from https://github.com/ros2/ros2/releases/download/opencv-archives/opencv-3.4.1-vc15.VS2017.zip
Assuming you unpacked it to C:\opencv, type the following on a Command Prompt (requires Admin privileges):
setx -m OpenCV_DIR C:\opencvSince you are using a precompiled ROS version, we have to tell it where to find the OpenCV libraries. You have to extend the PATH variable to c:\opencv\x64\vc15\bin
In ardent and earlier
These releases used OpenCV 2. You can download a precompiled version of OpenCV 2.4.13.2 from https://github.com/ros2/ros2/releases/download/release-beta2/opencv-2.4.13.2-vc14.VS2015.zip
Since you are using a precompiled ROS version, we have to tell it where to find the OpenCV libraries. Assuming you were extracting OpenCV to c:\ you have to extend the PATH variable to c:\opencv-2.4.13.2-vc14.VS2015\x64\vc14\bin
Install dependencies
There are a few dependencies not available in the Chocolatey package database. In order to ease the manual installation process, we provide the necessary Chocolatey packages.
As some chocolatey packages rely on it, we start by installing CMake
> choco install -y cmakeYou will need to append the CMake bin folder C:\Program Files\CMake\bin to the PATH (you can do this by clicking the Windows icon, typing "Environment Variables", then clicking on "Edit the system environment variables". In the resulting dialog, click "Environment Variables", the click "Path" on the bottom pane, then click "Edit" and add the path).
Please download these packages from this GitHub repository.
asio.1.12.1.nupkg
eigen-3.3.4.nupkg
tinyxml-usestl.2.6.2.nupkg
tinyxml2.6.0.0.nupkg
Once these packages are downloaded, open an administrative shell and execute the following command:
> choco install -y -s <PATH\TO\DOWNLOADS\> asio eigen tinyxml-usestl tinyxml2Please replace <PATH\TO\DOWNLOADS> with the folder you downloaded the packages to.
You must also install some python dependencies for command-line tools:
python -m pip install -U catkin_pkg empy pyparsing pyyaml setuptoolsDownloading ROS 2
Go the releases page: https://github.com/ros2/ros2/releases
Download the latest package for Windows, e.g.,
ros2-package-windows-AMD64.zip.there may be more than one binary download option which might cause the file name to differ.
[ROS Bouncy only] To download the ROS 2 debug libraries you'll need to download
ros2-bouncy-windows-Debug-AMD64.zipNotes:
Unpack the zip file somewhere (we'll assume
C:\dev\ros2).Note (Ardent and earlier): There seems to be an issue where extracting the zip file with 7zip causes RViz to crash on startup. Extract the zip file using the Windows explorer to prevent this.
Set up the ROS 2 environment
Start a command shell and source the ROS 2 setup file to set up the workspace:
> call C:\dev\ros2\local_setup.batFor ROS 2 releases up to and including Ardent, if you downloaded a release with OpenSplice support you must additionally source the OpenSplice setup file manually (this is done automatically for ROS 2 releases later than Ardent; this step can be skipped). It is normal that the previous command, if nothing else went wrong, outputs "The system cannot find the path specified." exactly once. Only do this step after you have sourced the ROS 2 setup file:
> call "C:\opensplice67\HDE\x86_64.win64\release.bat"Try some examples
In a command shell, set up the ROS 2 environment as described above and then run a talker:
> ros2 run demo_nodes_cpp talkerStart another command shell and run a listener:
> ros2 run demo_nodes_py listenerYou should see the talker saying that it's Publishing messages and the listener saying I heard those messages. Hooray!
If you have installed support for an optional vendor, see this page for details on how to use that vendor.
Troubleshooting
If at one point your example would not start because of missing dll's, please verify that all libraries from external dependencies such as OpenCV are located inside your
PATHvariable.If you forget to call the
local_setup.batfile from your terminal, the demo programs will most likely crash immediately.
--------------------- 本文来自 zhangrelay 的CSDN 博客 ,全文地址请点击:https://blog.csdn.net/ZhangRelay/article/details/82892892?utm_source=copy