硬核奶爸!用树莓派做个“智能婴儿监视器”:啼哭自动通知,还能分析哭声含义


-
它们只能充当一个传声筒:把声音从源头带到扬声器,却无法发现孩子哭声的含义; -
当家长要去到另一个房间里时,相应要把扬声器带到另一个房间,无法在任何其他现有的音频设备上播放声音; -
扬声器通常是低功率扬声器,无法连接到外部扬声器-这意味着,如果我在另一个房间播放音乐,我可能会听不到孩子的哭声,即便监控器和我在同一个房间也无法听到; -
大多数扬声器都是在低功率无线电波上工作的,这意味着如果婴儿在他/她的房间里,而你必须走到楼下,它们才能工作。
-
它可以运行于价廉物美的树莓派(RaspberryPI)与USB麦克风。
-
当孩子开始/停止哭泣时,它应该检测到孩子的哭声,并通知我(理想情况下是在我的手机上),或者跟踪我仪表板上的数据点,或者运行相应的任务。它不应该是一个单纯的对讲器,简单地将声音从一个源传递到另一个兼容的设备。 -
它能够在扬声器,智能手机,电脑等设备上传输音频。 -
它不受源和扬声器之间距离的影响,无需在整个房子里将扬声器移来移去。 -
它还应该有一个摄像头,可以利用摄像头对孩子实时监控,当他一开始哭,我便可以抓拍到图片或婴儿床的短视频,以检查有什么不对劲。
采集音频样本
      [sudo] apt-get install ffmpeg lame libatlas-base-dev alsa-utils


      [sudo] pip3 install tensorflow
arecord -l
      **** List of CAPTURE Hardware Devices ****


      card 1: Device [USB PnP Sound Device], device 0: USB Audio [USB Audio]


      Subdevices: 0/1


      Subdevice #0: subdevice #0


      card 2: Device_1 [USB PnP Sound Device], device 0: USB Audio [USB Audio]


      Subdevices: 0/1


      Subdevice #0: subdevice #0
arecord -D plughw:2,0 -c 1 -f cd | lame - audio.mp3
标注音频示例
      ~/datasets/sound-detect/audio


        -> sample_1


          -> audio.mp3


          -> labels.json


        -> sample_2


          -> audio.mp3


          -> labels.json


        ...
      {


      "00:00": "negative",


      "02:13": "positive",


      "04:57": "negative",


      "15:41": "positive",


      "18:24": "negative"


      }
生成数据集
      git clone git@github.com:/BlackLight/micmon.git


      cd micmon


      [sudo] pip3 install -r requirements.txt


      [sudo] python3 setup.py build install
      micmon-datagen \


          --low 250 --high 2500 --bins 100 \


          --sample-duration 2 --channels 1 \


      ~/datasets/sound-detect/audio  ~/datasets/sound-detect/data
      import os


      from micmon.audio import AudioDirectory, AudioPlayer, AudioFile


      from micmon.dataset import DatasetWriter


      basedir = os.path.expanduser('~/datasets/sound-detect')


      audio_dir = os.path.join(basedir, 'audio')


      datasets_dir = os.path.join(basedir, 'data')


      cutoff_frequencies = [250, 2500]


      # Scan the base audio_dir for labelled audio samples


      audio_dirs = AudioDirectory.scan(audio_dir)


      # Save the spectrum information and labels of the samples to a


      # different compressed file for each audio file.


      for audio_dir in audio_dirs:


          dataset_file = os.path.join(datasets_dir, os.path.basename(audio_dir.path) + '.npz')


          print(f'Processing audio sample {audio_dir.path}')


      with AudioFile(audio_dir) as reader, \


                  DatasetWriter(dataset_file,


                                low_freq=cutoff_frequencies[0],


                                high_freq=cutoff_frequencies[1]) as writer:


      for sample in reader:


                  writer += sample
训练模型
      import os


      from tensorflow.keras import layers


      from micmon.dataset import Dataset


      from micmon.model import Model


      # This is a directory that contains the saved .npz dataset files


      datasets_dir = os.path.expanduser('~/datasets/sound-detect/data')


      # This is the output directory where the model will be saved


      model_dir = os.path.expanduser('~/models/sound-detect')


      # This is the number of training epochs for each dataset sample


      epochs = 2


      # Load the datasets from the compressed files.


      # 70% of the data points will be included in the training set,


      # 30% of the data points will be included in the evaluation set


      # and used to evaluate the performance of the model.


      datasets = Dataset.scan(datasets_dir, validation_split=0.3)


      labels = ['negative', 'positive']


      freq_bins = len(datasets[0].samples[0])


      # Create a network with 4 layers (one input layer, two intermediate layers and one output layer).


      # The first intermediate layer in this example will have twice the number of units as the number


      # of input units, while the second intermediate layer will have 75% of the number of


      # input units. We also specify the names for the labels and the low and high frequency range


      # used when sampling.


      model = Model(


          [


              layers.Input(shape=(freq_bins,)),


              layers.Dense(int(2 * freq_bins), activation='relu'),


              layers.Dense(int(0.75 * freq_bins), activation='relu'),


              layers.Dense(len(labels), activation='softmax'),


          ],


          labels=labels,


          low_freq=datasets[0].low_freq,


          high_freq=datasets[0].high_freq


      )


      # Train the model


      for epoch in range(epochs):


      for i, dataset in enumerate(datasets):


              print(f'[epoch {epoch+1}/{epochs}] [audio sample {i+1}/{len(datasets)}]')


              model.fit(dataset)


              evaluation = model.evaluate(dataset)


              print(f'Validation set loss and accuracy: {evaluation}')


      # Save the model


      model.save(model_dir, overwrite=True)
利用模型进行预测
      import os


      from micmon.audio import AudioDevice


      from micmon.model import Model


      model_dir = os.path.expanduser('~/models/sound-detect')


      model = Model.load(model_dir)


      audio_system = 'alsa'        # Supported: alsa and pulse


      audio_device = 'plughw:2,0'  # Get list of recognized input devices with arecord -l


      with AudioDevice(audio_system, device=audio_device) as source:


      for sample in source:


              source.pause()  # Pause recording while we process the frame


              prediction = model.predict(sample)


              print(prediction)


              source.resume() # Resume recording
      [sudo] apt-get install redis-server


      [sudo] systemctl start redis-server.service


      [sudo] systemctl enable redis-server.service


      [sudo] pip3 install 'platypush[http,pushbullet]'
      backend.http:


      enabled: True


      pushbullet:


      token: YOUR_TOKEN
      #!/usr/bin/python3


      import argparse


      import logging


      import os


      import sys


      from platypush import RedisBus


      from platypush.message.event.custom import CustomEvent


      from micmon.audio import AudioDevice


      from micmon.model import Model


      logger = logging.getLogger('micmon')


      def get_args():


          parser = argparse.ArgumentParser()


          parser.add_argument('model_path', help='Path to the file/directory containing the saved Tensorflow model')


          parser.add_argument('-i', help='Input sound device (e.g. hw:0,1 or default)', required=True, dest='sound_device')


          parser.add_argument('-e', help='Name of the event that should be raised when a positive event occurs', required=True, dest='event_type')


          parser.add_argument('-s', '--sound-server', help='Sound server to be used (available: alsa, pulse)', required=False, default='alsa', dest='sound_server')


          parser.add_argument('-P', '--positive-label', help='Model output label name/index to indicate a positive sample (default: positive)', required=False, default='positive', dest='positive_label')


          parser.add_argument('-N', '--negative-label', help='Model output label name/index to indicate a negative sample (default: negative)', required=False, default='negative', dest='negative_label')


          parser.add_argument('-l', '--sample-duration', help='Length of the FFT audio samples (default: 2 seconds)', required=False, type=float, default=2., dest='sample_duration')


          parser.add_argument('-r', '--sample-rate', help='Sample rate (default: 44100 Hz)', required=False, type=int, default=44100, dest='sample_rate')


          parser.add_argument('-c', '--channels', help='Number of audio recording channels (default: 1)', required=False, type=int, default=1, dest='channels')


          parser.add_argument('-f', '--ffmpeg-bin', help='FFmpeg executable path (default: ffmpeg)', required=False, default='ffmpeg', dest='ffmpeg_bin')


          parser.add_argument('-v', '--verbose', help='Verbose/debug mode', required=False, action='store_true', dest='debug')


          parser.add_argument('-w', '--window-duration', help='Duration of the look-back window (default: 10 seconds)', required=False, type=float, default=10., dest='window_length')


          parser.add_argument('-n', '--positive-samples', help='Number of positive samples detected over the window duration to trigger the event (default: 1)', required=False, type=int, default=1, dest='positive_samples')


          opts, args = parser.parse_known_args(sys.argv[1:])


      return opts


      def main():


          args = get_args()


      if args.debug:


              logger.setLevel(logging.DEBUG)


          model_dir = os.path.abspath(os.path.expanduser(args.model_path))


      model = Model.load(model_dir)


      window = []


          cur_prediction = args.negative_label


          bus = RedisBus()


      with AudioDevice(system=args.sound_server,


                           device=args.sound_device,


                           sample_duration=args.sample_duration,


                           sample_rate=args.sample_rate,


                           channels=args.channels,


                           ffmpeg_bin=args.ffmpeg_bin,


                           debug=args.debug) as source:


      for sample in source:


                  source.pause()  # Pause recording while we process the frame


      prediction = model.predict(sample)


                  logger.debug(f'Sample prediction: {prediction}')


                  has_change = False


      if len(window) < args.window_length:


      window += [prediction]


      else:


      window = window[1:] + [prediction]


                  positive_samples = len([pred for pred in window if pred == args.positive_label])


      if args.positive_samples <= positive_samples and \


      prediction == args.positive_label and \


                          cur_prediction != args.positive_label:


                      cur_prediction = args.positive_label


                      has_change = True


                      logging.info(f'Positive sample threshold detected ({positive_samples}/{len(window)})')


                  elif args.positive_samples > positive_samples and \


      prediction == args.negative_label and \


                          cur_prediction != args.negative_label:


                      cur_prediction = args.negative_label


                      has_change = True


                      logging.info(f'Negative sample threshold detected ({len(window)-positive_samples}/{len(window)})')


      if has_change:


                      evt = CustomEvent(subtype=args.event_type, state=prediction)


                      bus.post(evt)


                  source.resume() # Resume recording


      if __name__ == '__main__':


      main()
      mkdir -p ~/.config/platypush/scripts


      cd ~/.config/platypush/scripts


      # Define the directory as a module


      touch __init__.py


      # Create a script for the baby-cry events


      vi babymonitor.py
      from platypush.context import get_plugin


      from platypush.event.hook import hook


      from platypush.message.event.custom import CustomEvent


      @hook(CustomEvent, subtype='baby-cry', state='positive')


      def on_baby_cry_start(event, **_):


          pb = get_plugin('pushbullet')


          pb.send_note(title='Baby cry status', body='The baby is crying!')


      @hook(CustomEvent, subtype='baby-cry', state='negative')


      def on_baby_cry_stop(event, **_):


          pb = get_plugin('pushbullet')


          pb.send_note(title='Baby cry status', body='The baby stopped crying - good job!')
      mkdir -p ~/.config/systemd/user


      wget -O ~/.config/systemd/user/platypush.service \


          https://raw.githubusercontent.com/BlackLight/platypush/master/examples/systemd/platypush.service


      systemctl --user start platypush.service


      systemctl --user enable platypush.service
      [Unit]


      Description=Monitor to detect my baby's cries


      After=network.target sound.target


      [Service]


      ExecStart=/home/pi/bin/micmon_detect.py -i plughw:2,0 -e baby-cry -w 10 -n 2 ~/models/sound-detect


      Restart=always


      RestartSec=10


      [Install]


      WantedBy=default.target
      systemctl --user start babymonitor.service


      systemctl --user enable babymonitor.service
安装宝贝摄像头
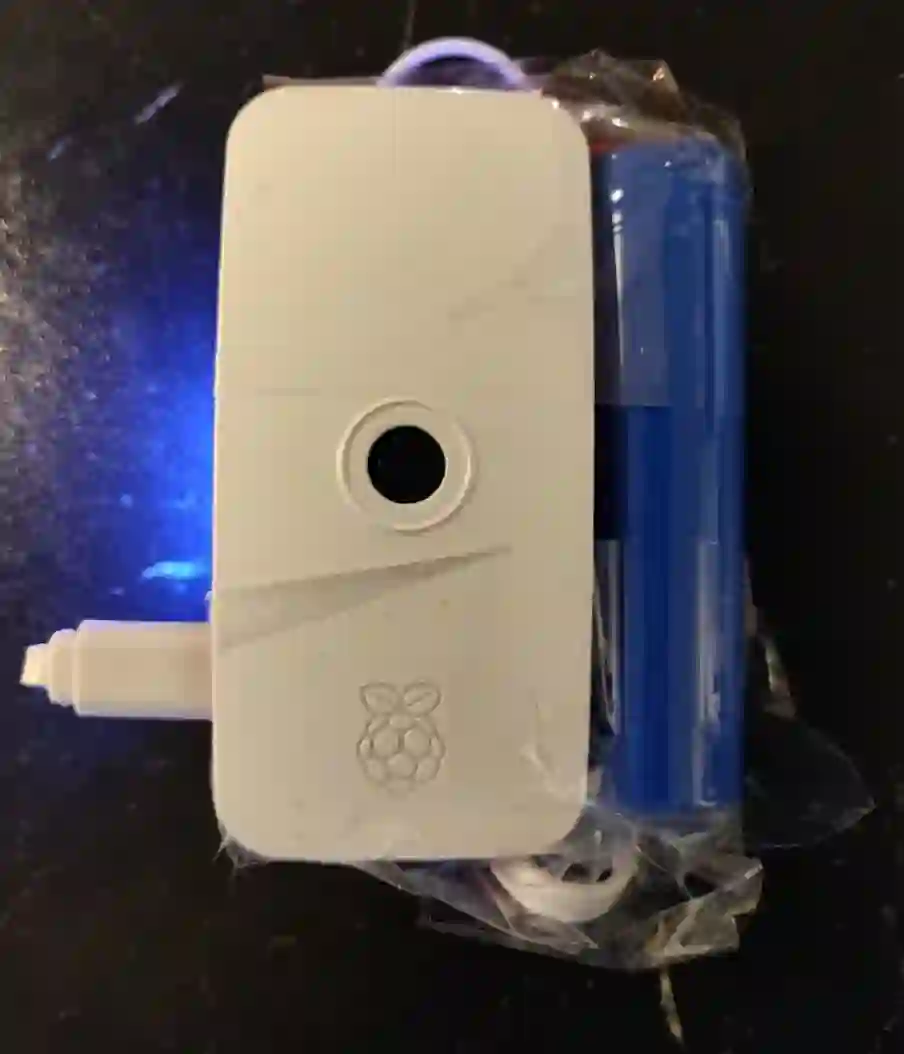
婴儿监视器摄像头模块的第一个原型
[sudo] pip3 install 'platypush[http,camera,picamera]'
      camera.pi:


          listen_port: 5001
wget http://raspberry-pi:8008/camera/pi/photo.jpg
http://raspberry-pi:8008/camera/pi/video.mjpg
      mkdir -p ~/.config/platypush/scripts


      cd ~/.config/platypush/scripts


      touch __init__.py


      vi camera.py
vlc tcp/h264://raspberry-pi:5001


登录查看更多
相关内容


相关VIP内容
相关资讯
相关论文