TensorFlow 1.9 新增 tf.keras 官方入门教程(Keras与TF的深度集成)
【导读】Keras是深度学习框架中最适合工程化的框架之一,具有简单友好的接口。TensorFlow虽然功能强大,但是对于工程师来说,它的使用却十分的繁琐。好消息是Keras的许多核心功能已经融入了原生的TensorFlow(tf.keras),TensorFlow 1.9新增tf.keras官方入门文档,介绍了tf.keras的使用。
这几天打开TensorFlow的官方教程页(https://www.tensorflow.org/tutorials/),会发现教程页中给出的DEMO变成了基于tf.keras的教程。其实,tf.keras模块早就存在于老版本的TensorFlow中,官方一直在完善它的功能。在TensorFlow 1.9放出了tf.keras的官方教程,看来是tf.keras模块已经做得很稳定了。

用过Keras的都知道,对于工程来说,Keras相对于TensorFlow具有更友好的接口、更简洁的代码以及一些常用的工具类。例如,Keras Applications是Keras提供的一套非常好用的模型库,直接包含了下面的模型,简直就是工程师的瑞士军刀:
Xception
VGG16
VGG19
ResNet50
InceptionV3
InceptionResNetV2
MobileNet
DenseNet
NASNet
MobileNetV2
例如通过下面的代码就可以直接使用VGG 16提取特征:
from keras.applications.vgg16 import VGG16
from keras.preprocessing import image
from keras.applications.vgg16 import preprocess_input
import numpy as np

model = VGG16(weights='imagenet', include_top=False)

img_path = 'elephant.jpg'
img = image.load_img(img_path, target_size=(224, 224))
x = image.img_to_array(img)
x = np.expand_dims(x, axis=0)
x = preprocess_input(x)

features = model.predict(x)
虽然现在Keras的主流是使用TensorFlow作为内核,但是直接混用Keras和TensorFlow还是很有难度的。在Keras中使用TensorFlow要按照Keras的规范使用TensorFlow来定制各种层,还是比较繁琐的。tf.keras使得TensorFlow和Keras进行了深度的融合,不需要安装Keras,就可以在TensorFlow中直接使用Keras的各种功能,而且tf.keras中的模块是按照TensorFlow的规范定制的,自身就是原生的TensorFlow程序,可以和你原来写的TensorFlow代码进行无缝接轨。
在TensorFlow的官方文档中,可以找到名为tf.keras.applications的Module ( https://www.tensorflow.org/api_docs/python/tf/keras/applications ),并且,keras.applications下的模型几乎都被搬运了过来。
densenet module: DenseNet models for Keras.
inception_resnet_v2 module: Inception-ResNet V2 model for Keras.
inception_v3 module: Inception V3 model for Keras.
mobilenet module: MobileNet v1 models for Keras.
nasnet module: NASNet-A models for Keras.
resnet50 module: ResNet50 model for Keras.
vgg16 module: VGG16 model for Keras.
vgg19 module: VGG19 model for Keras.
xception module: Xception V1 model for Keras.
可以看一下用tf.keras构建模型有多么容易,下面的例子与Keras的写法差不多。同样的模型使用TensorFlow静态图来构建可能需要两倍以上的代码量:
import tensorflow as tf
mnist = tf.keras.datasets.mnist

(x_train, y_train),(x_test, y_test) = mnist.load_data()
x_train, x_test = x_train / 255.0, x_test / 255.0

model = tf.keras.models.Sequential([
  tf.keras.layers.Flatten(),
  tf.keras.layers.Dense(512, activation=tf.nn.relu),
  tf.keras.layers.Dropout(0.2),
  tf.keras.layers.Dense(10, activation=tf.nn.softmax)
])
model.compile(optimizer='adam',
              loss='sparse_categorical_crossentropy',
              metrics=['accuracy'])

model.fit(x_train, y_train, epochs=5)
model.evaluate(x_test, y_test)
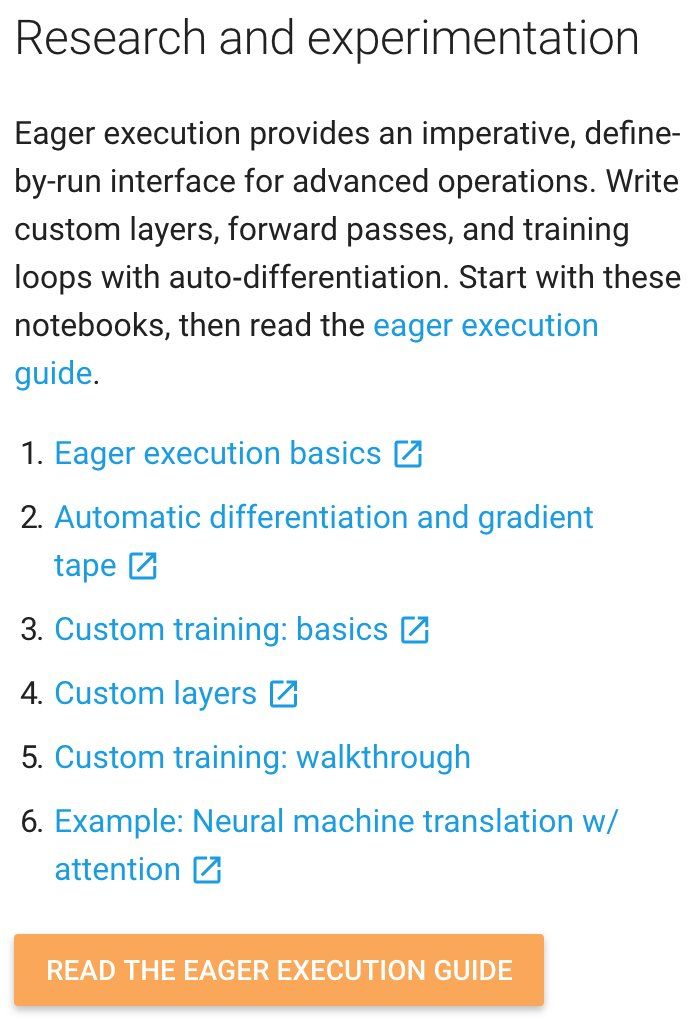
另外值得一提的是,tf.keras在TensorFlow的动态图(Eager)中也扮演着重要的作用,在TensorFlow Eager的官方教程中,推荐使用tf.keras.Model来封装模型:
https://www.tensorflow.org/guide/eager
class MNISTModel(tf.keras.Model):
  def __init__(self):
    super(MNISTModel, self).__init__()
    self.dense1 = tf.keras.layers.Dense(units=10)
    self.dense2 = tf.keras.layers.Dense(units=10)

  def call(self, input):
    """Run the model."""
    result = self.dense1(input)
    result = self.dense2(result)
    result = self.dense2(result)  # reuse variables from dense2 layer
    return result

model = MNISTModel()
除了tf.keras,TensorFlow 1.9发布了更多的和动态图相关的教程。
参考链接:https://www.tensorflow.org/tutorials/
-END-
专 · 知
人工智能领域主题知识资料查看与加入专知人工智能服务群:
【专知AI服务计划】专知AI知识技术服务会员群加入与人工智能领域26个主题知识资料全集获取。欢迎微信扫一扫加入专知人工智能知识星球群,获取专业知识教程视频资料和与专家交流咨询!

请PC登录www.zhuanzhi.ai或者点击阅读原文,注册登录专知,获取更多AI知识资料!
请加专知小助手微信(扫一扫如下二维码添加),加入专知主题群(请备注主题类型:AI、NLP、CV、 KG等)交流~

请关注专知公众号,获取人工智能的专业知识!
点击“阅读原文”,使用专知
展开全文